

How to Do an Unhooked Back Roll
Unhooked Back Roll
Basics
Difficulty 2
Today we’re going to breakdown a heelside back roll. Learning the back roll is going to open the door to many other more advanced tricks that begin with this rotation. Tricks like the Back to Blind, the KGB or even Back Mobes. Like all sports, it comes down to repetition and practicing the basics.
The Back Roll is often a misunderstood trick. Not because it's overly difficult but because people often mistake it for a flip and while you can invert your back rolls into a flip. More often than not, they look more like an off axis 360. This is where you want to start. And it leads to a lot of fun progressions. Pair this with a front 180 and you have a back to revert. Add a back 180 and you have the back to blind. Take that a step further with the backside 360 and you have the KGB.
For those of you that are new to rotations, backside means to spin looking over your back shoulder. Frontside is to spin looking over your front shoulder.
Once you get the Back Roll dialed, you should start working on surface passes the air krypt, and the Back to Revert. Put your time in and don’t worry about progressing to the next step until you can land your current version of this trick at least three times in a row.Remember, Mastery is nothing more than repetition of the basics and these are the fundamentals of all tricks.
Difficulty scale
While maybe a little intimidating, this trick is not difficult at all. The falls aren't that bad either. If you mess up, you’ll just fall on your back in the water. On the scale of one to ten this is a 2. Prerequisites for this trick are the pop, and the raley is recommended grated some people learn back rolls first. I actually did.
We’ll break this trick down into 4 phases
1 Loading, 2 the release, 3 body position, & 4 landing
Get a solid load before you pop
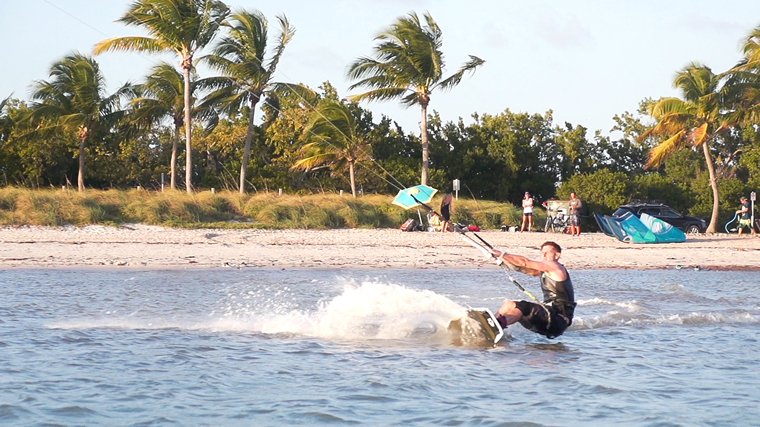
Step One - Loading
Keep the kite at 1 or 11 o’clock and come in with moderate speed. Ride downwind to unhook an start to carve back upwind and lean backward. Remember, just like our popping video, you need to keep good body posture and stay locked at your hips while loading up your lines.
You’ll feel tension load up. For the backroll, it’s a good idea to load a bit longer than the rally. You need the extra pop and height to throw you into the roll. Right as the the tension hits it apex, Hold a moment longer. Now you’ll want to look over your back shoulder, carve away from the kite and stomp down on your back foot.
Carve away from the kite and throw your hips into the air
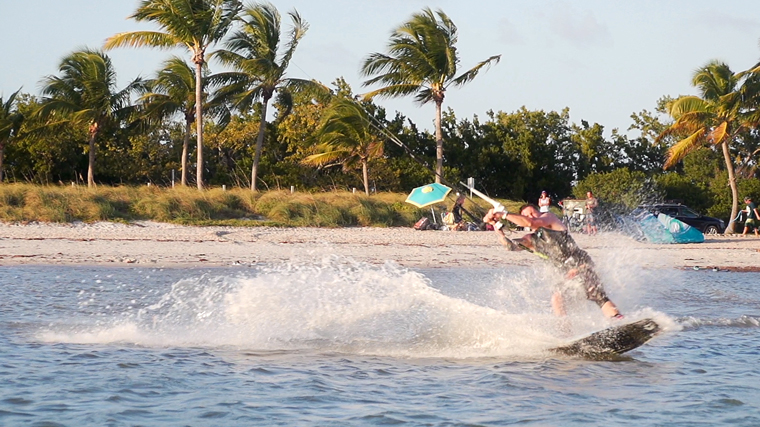
Step Two - The Release
In our rally video, we talked about the different types of releases. For the Back roll, it might be tempting to release late. You can even complete a good part of the rotation before you leave the water. That’s actually bad form unless you’re going for a bigger trick. Imagine your are going for a really powered rally. As you pop the board out of the water, the scoop is similar to a rally except you’ll follow the momentum through and roll with it.
Stomp down with your back heel, look over your shoulder Bring your front knee into your chest and swing your hips around. It helps to throw your arms and hips into the air. This will allow the kite to take you higher off the water.
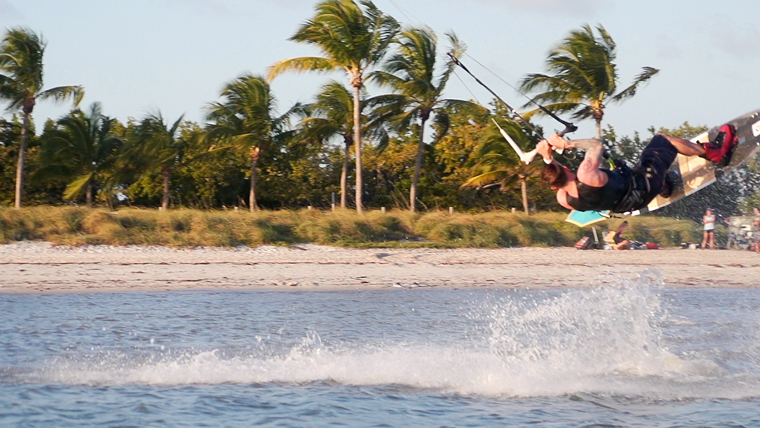
Step Three - Body Position
Your body is going to follow your head on this trick. To initiate the roll, you just just look over your shoulder and swing your hips. At first keep things simple and just go for a basic roll. Keep your knees tucked in for this one or you’ll get stretched out. It’s always good form to keep one knee more tucked than the other. From here, you can start experimenting with how you roll. Either by spinning with the momentum after your scope or you really swing your back hip into a more inverted roll. I don't recommend inverting until you have this one dialed but when you are ready there are a couple ways to initiate the inversion. First, you always start with the head, throw your head back to open up, swing your hips up harder than before. You can also do a small kick with the board to get those legs swinging above your head.
Arm position
Keep a slight bend in your arms and keep your hands close together and the bar closer to your chest. You don’t want to let the bar get away from you like on a rally. It’s going to stretch you out and making everything awkward. This will also help later on when you try to incorporate spins.
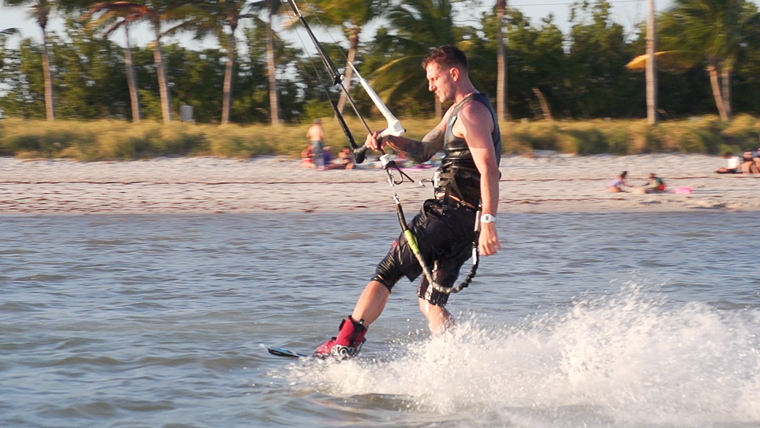
Always land flat and downwind
Landing
To land, as you look over your shoulder you should be able to see the water pretty quickly, look at the water and spot your landing. Pull hard on your front hand to flick the kite down and pull the control bar hard into your lead hip. Point your nose at the kite and land flat centered over both of your feet. Not favoring any edge. This will take the power out of the landing and it’s going to look better.
After you land this a few times, I recommend letting go with your back hand. It’s going to make everything look and feel more fluid.
To do this, as soon as you get the board under you, just bend your knees let go with your back hand. Remember to land flat and riding at the kite. Hook back in before you lose too much board speed and ride away.
What to try next.
Now that you’ve learned the Back Roll, Front rolls, riding blind riding wrapped. And some surface passes are in order.
These tricks are at the heart of all freestyle tricks moving forward. Put your time in and have fun with it!
 Ryan (Rygo) Goloversic
Just a dude from a kite shop testing all the gear one session at a time.
Many people dream of quitting their job, traveling the world and pursuing their passions. Rygo is one of those people who pulled the trigger. A few years into a postal career, he decided to change everything and travel as a kiteboarder, freelance videographer & writer. His mission is to help people and share the stoke. Get out there and kite!
Producer of: Ride with Blake I Sessions I Versus I Destinations I Foil Fridays
Recent Posts
-

AFS Stow Parawing Review: Value and Performance
Tucker from MACkiteboarding has been riding the 4.5m AFS Stow Parawing for a number of hours and s …24th Jul 2026 -

Best Wing Foil Upgrades to Level Up Your Riding
With the massive boom in wing foiling over the last three years, a lot of riders now have a couple …24th Jul 2026 -

Buying Your Next Wing: Top Questions Answered
Jeff and Tucker from MACkite dive into the questions they get asked every single day by riders loo …23rd Jul 2026