

Kiteboarding Transitions: Toeside Backflip
Today we are going to go over how to Toeside backflip transition. This is the second video in our intermediate to advanced transition playlist. Normally we focus on beginner and intermediate level tricks. Don't worry, we have some easier transitions lined up for this playlist. This trick is an interesting variation of the back roll. You're adding some style and difficulty by popping toeside and adding a jump transition into the kite movement.

We recommend you download the free PDF
Some prerequisites for this would be riding toeside, back rolls and jumping transitions. If you can do these things, you should be able to put this one together with some practice.
![]()
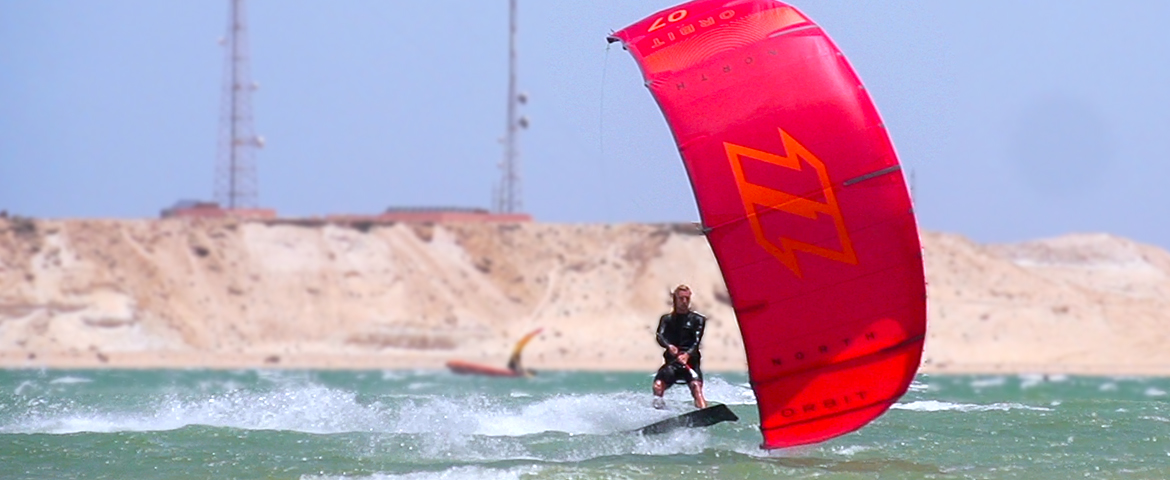
The toeside pop is the most difficult step
Step One- Master the Toeside Pop
The first step to learning this trick is to spend a lot of time riding toeside and learning to pop for that edge. If you only jump from heel side, chances are your muscles are going to be weaker from this angle and you'll lack the muscle memory. The only way to work on this is to spend a lot of time practicing. Start riding toeside and popping of little pieces of chop on a regular basis. Experiment with sending the kite and just jumping from toeside to heelside as you build up the strength. After a few diligent sessions, you should be able to send the kite, pop from your toeside and and get decent air like your normal jumps.
![]()
Learn Jump Transitions
Step Two- Learn Jump Transitions
There are two ways you can transitions from any jump. The first being to simply re-direct the kite mid jump and dive it back in the opposite direction. The second being to implement a downloop and ride the other way as you are landing your jump. You can use either method for this trick. We've done a video on each of these. The Jump Transition and the Downloop transition. If you don't care to watch, we'll recap these for you here in the written steps.
The Jump Transition
Come in with moderate speed and the kite at 45. Send the kite to noon and edge against it. Near the apex, sheet in and push down with your back leg. The kite will swing from one side of the wind window to the other. You can do what ever you please in the air.
As you feel yourself start to decend, pull hard on what was your front hand to bring the kite back over, now pull hand on what was your back hand. This will become your new front hand as you dive the kite back down to a 45 degree angle. Land flat pointing your new nose towards the kite. After a clean landing, start to edge back upwind and ride away.
The Downloop Transition
Come in with moderate speed and the kite at 45. Send the kite to noon and edge against it. Near the apex, sheet in and push down with your back leg. The kite will swing from one side of the wind window to the other. You can do whatever you please in the air.
As you feel yourself start to drop, pull hard on your front hand to dive the kite forward. You can initiate the loop after you land, or right before for more power and style. Brace for impact by landing flat and absorbing the landing with your knees lined up over the board. Ride downwind and allow the loop pull you into the other direction.
![]()
You need to redirect the kite in to opposite direction
Step Three - The Toeside Back Flip
This step is similar to a back roll. With the back roll, you look over your back shoulder and throw your hips into the roll. For this, you need pay attention to how your body moves. The main difference is that you are going to be throwing your head back and arching your back while back rolling. Everything else is actually the same.
Kite movement
The movement will be the same as described in the jump transition. As you throw your head back you should still be rolling around the axis point where your centerlines connect to the harness. You will feel the pull of the kite and you roll underneath it. As you come out of the roll, you will want to be pulling hard on your new front hand.
Tips
When doing a backroll, its good practice to take your backhand off. This helps redirect the kite back down. For this trick, keep both hands on the bar until you are ready to redirect the kite in the opposite direction. When you complete the roll, take what was your front hand off. Your old backhand will pull the kite down and become your new front hand.
![]()
Spot your landing
Step Four- Look at your landing
Spot your landing over the back shoulder, waiting for the pull of the kite, rotating your body and then coming around for landing. Where your eyes are looking, the body will follow. This is important for every trick but especially when throwing a kiteloop. Aligning your body up with the landing is important just like it is in an airplane. The more of an angle you come down at the harder the landing will be. Absorb on impact and have your board flat with your body weight centered over it.
![]()
The downloop
Step Five- Adding power with the Downloop
The traditional jump transition variation will look floaty and smooth. If you want to spice things up and add some power, add a downloop.
For this step, you will be repeating all of step four. The main difference is you'll keep your front hand on the bar like you normally would. When you land, take it to revert aka landing toeside. Ride downwind and let the kite pull you into the transition. While it is more powered, this variation might be easier for some as you're just doing a backroll to revert with the added style of popping toeside, throwing your head back and arching while landing faster and powered with the loop.
The North Orbit and Atmos
Gear Used for this Playlist
We had the chance to try out all the new North kiteboarding equipment for the brand launch in Dahkla Morroco this summer. For this playlist the Orbit was the top choice. Fast turning, Quick to catch you on loops and tons of hangtime. A true performance big air kite. In contrast to previous kites we've used on past playlists the Orbit is faster, more energized and aimed at performance big air riding. Yet, seems to lack some of the low end of the Cabrinha Switchblade we often film with. It's also more user friendly than the FX that we often use when looking for a faster performance kite. It sits right between these two kites for riders that want a lofty and reactive kite.
We also used the North Carve for a good portion of the filming. While it is a surf kite, we wanted to demonstrate the all around potential that the carve brings to the table
Ride the Gear
North Orbit - Big Air / Performance
North Atmos - Big Air / Performance
North Carve - Waves / All Around
North Focus - Wakestyle / Freestyle
-Written and produced by Blake Olsen & Ryan (Rygo) Goloversic.
 Blake Olsen
A Michigan boy through and through (even though he was born in Saudi Arabia), Blake is a youth with a lifetime of experiences and adventures. Not only that, he's passionate about sharing his zest for life with others. He is proficient at many fields, including kiteboarding and acting as concierge to any who simply ask. Looking for an adventure? Well, Blake is your guy. From sailing the Gulf and the Caribbean to backpacking Hawaii and Southeast Asia, he knows his stuff and can make your vacation into an adventure.
Instagram: @BlakeTheOlsen
 Ryan (Rygo) Goloversic
Many people dream of quitting their job, traveling the world and pursuing their passions. Rygo is one of those people who pulled the trigger. A few years into a postal career, he decided to change everything and travel as a kiteboarder, freelance videographer & writer. His mission is to help people and share the stoke. Get out there and kite!
Producer of: Ride with Blake I Sessions I Versus I Destinations I Foil Fridays
Recent Posts
-

Vayu Pyro 4M Parawing Review
Tucker has been testing the 4-meter Vayu Pyro — one of the most asked-about parawings on the marke …8th Jul 2026 -

Wakefoiling the FLITElab 808 Flux Behind the Boat
Tucker is out on the water in Grand Haven, Michigan, with Adam Bennetts from FLITElab. With no lak …8th Jul 2026 -

The Casati Family at GKA Mykonos: A Kiteboarding Dynasty in the Making
The Brazilian Brothers caught up with the Casati family on the beach at the GKA Kite World Cup in …8th Jul 2026