

Waydoo EVO Remote Settings Guide
Eli walks through all the settings you'll find in your Waydoo EVO remote, from the basics of powering on to the deeper menus that personalize your ride.
Navigating Your Waydoo EVO Remote
Starting simple: power on. Just hold the power button and the remote will fire up. The main screen displays your speed (in either miles per hour or kilometers per hour), board battery level, remote battery level at the top, what gear you're in, and the board angle. This is universal across all EVO models — the remote looks the same and gives the same information regardless of which board you're paired with.
Entering the General Settings
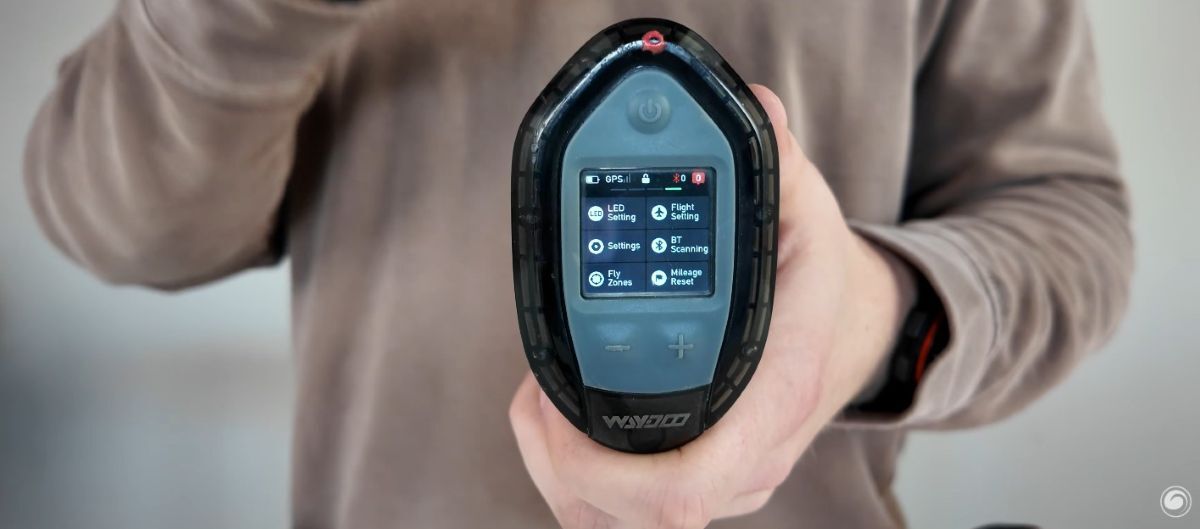
To get to the general settings, press the power button two to three times: two presses normally, three if you have an error code on screen. That takes you right to the main settings screen, which includes LED settings, Flight settings, general Settings, Bluetooth scanning, Fly zones, and Mileage reset.
To navigate any of these menus, pull the trigger while on this screen. Once a menu option is highlighted, pull the trigger again to enter it. Use the plus and minus buttons to scroll through options, and hit the power button to go back.
LED Settings
Pulling the trigger on LED settings brings up the LED Display Mode, which offers several options:
- Off
- Always On
- Blink Slow
- Blink Normal
- Blink Fast
- Breathe
- Flash
Set it to whatever look you want for your board. There are also LED Color options including Cyan, White, Purple, Amber, Blue, Green, and Red. Finally, there's an SOS mode that flashes the LEDs in a distress pattern.
Flight Settings
To get to Flight settings, hit the plus button to scroll down and pull the trigger to enter. On the Pro Plus or Max Plus, this is where you'll turn Flight Assist on or off — handy for switching between riders who do and don't want it, or just turning it off for the day. Pull the trigger and it toggles on.
When Flight Assist is on, you can set the level: High, Medium, or Low. Hit the plus button, pull the trigger, and scroll through the options.
General Settings
Back on the main menu, the Settings option is where you'll find time control, gear jump, miles per hour vs. kilometers per hour, and the general use settings that make the remote easier to see or more personalized.
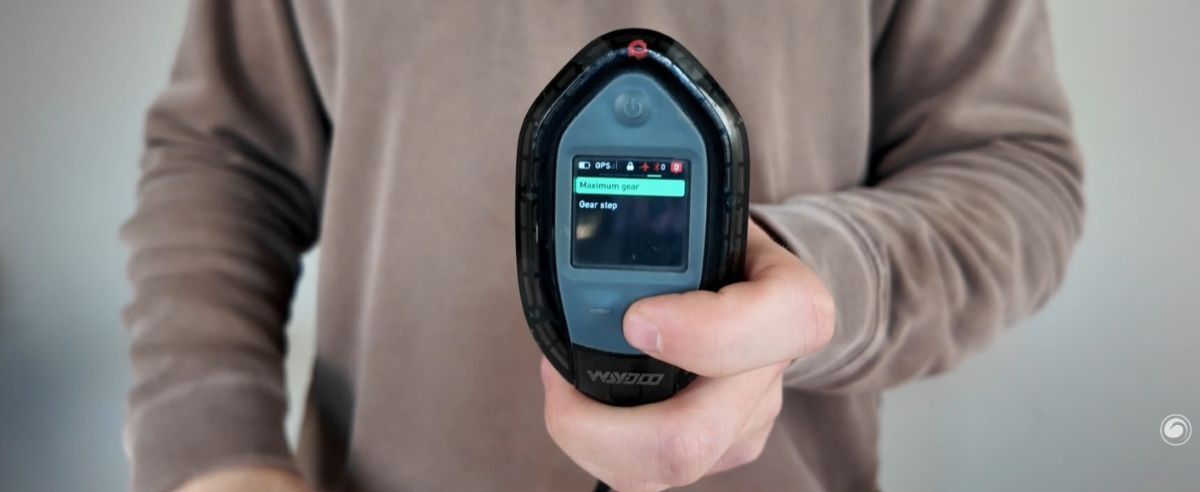
Gear Setting
Inside the Gear setting, you can configure your Maximum gear and your Gear step. The maximum gear sets the top speed cap, great if you're putting a son or daughter on the board and don't want them going past gear 15, for example. Click in, scroll down to 15, hit back, and it saves. The remote won't go past gear 15 from there on out.
The Gear Step controls how many gears the remote jumps each time you hit plus or minus. For example, if you set the gear step to 2, and pressing plus at gear 8 jumps you straight to gear 10 — no need to click the button twice. Some riders like big gear jumps, others prefer single-gear precision. It's all preference.
Unit Setting
Unit settings is where you switch between kilometers and miles. Both speed and distance can be set here using the same controls: trigger to click in, plus and minus to scroll.
Home Screen Setting
Home screen settings let you customize two readouts on the right side of the main screen — one labeled "top" and one labeled "bottom." Options include home distance, gear, total time, angle, and power.
For example, you might set the top box to board angle and the bottom box to total time on the water. Where the angle sensor used to live, you now have your total session time displayed instead.
Throttle Calibration
Throttle calibration is an important one. If you go to run the motor and the trigger only responds when pulled halfway or a quarter of the way, but not when fully pulled or fully extended, you might think the remote is glitching or that you need a new trigger. Try this first: this little trick solves 90% of those issues.
Click into Throttle Calibration, and the remote will tell you to hold the trigger and short press minus. Then it'll ask you to release the trigger and short press minus. Once calibration is complete, those throttle issues should be fixed.
Theme
For dark mode, this is the menu. Click in, choose between the White theme and the Black theme, and the remote will prompt you to restart and switch themes. After the reboot, it'll be set to your new look.
Bluetooth Scanning
Bluetooth scanning is how you pair the EVO remote to the board, and it's probably the most-used feature in the menu. Click in and it immediately starts scanning. When a board appears highlighted in green, pull the trigger on it to connect.
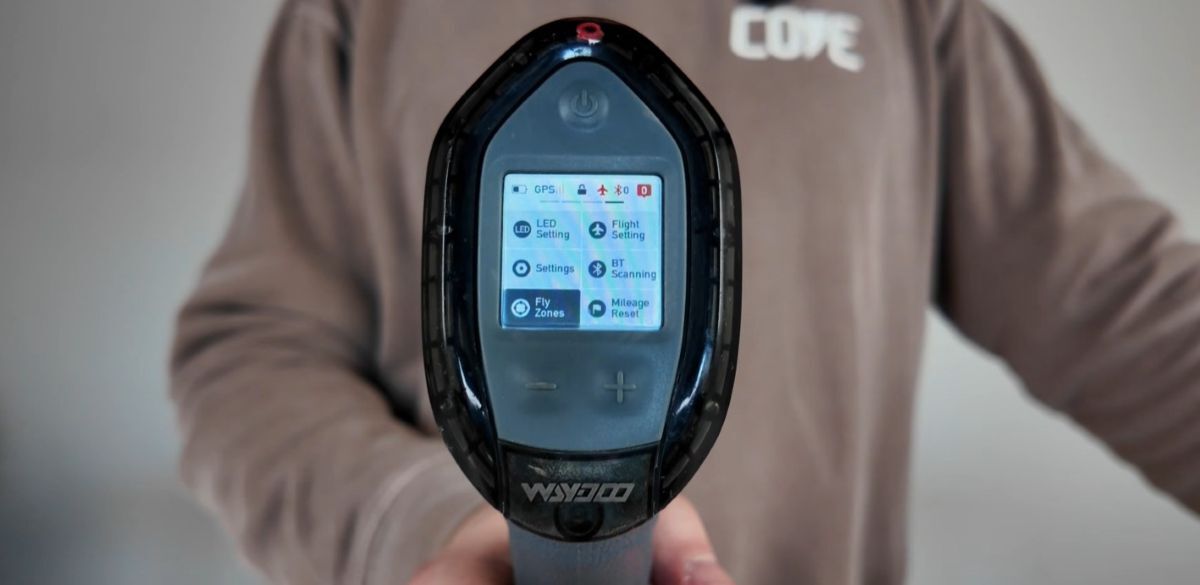
Fly Zones
Fly Zones is where you set boundaries on the controller and Waydoo app. This can be useful for keeping kids inside a specific part of the lake — if they cross out of the zone, the board powers down into a limp mode, and they'll have to return to the fly zone to regain full power.
Basic Controls Summary
To recap the basic controls from the main screen:
- Press the power button to scroll to your settings.
- Pull the trigger to enter menus and select "okay."
- Use the plus and minus buttons to scroll through settings.
- Press the power button to exit settings and go back.
Two features stand out as especially useful day-to-day: Bluetooth scanning for pairing the remote to a board (the menu you'll use most often), and Fly Zones for setting safe ride boundaries that automatically slow the board if it crosses out.
And if your throttle ever feels off, throttle calibration is the first thing to try — it solves the vast majority of trigger-response issues. Once you've clicked through the menus a few times, the remote becomes second nature.
MACkite Subscription Links:
YouTube | Instagram | Spotify Oddcasts
Contact MACkite Below:
800.622.4655 | Kiteboarder@MACkite.com | LIVE Chat Messenger
Recent Posts
-

Tips for Learning How to Parawing
Parawing has officially hit the market, offering an exciting new way to engage with your foil and …17th Jun 2026 -

Foil Drive Fusion Review: Long-Term Impressions After Months in the Quiver
Ryan and Hunter have been riding the Foil Drive Fusion for a while now. Recently, they put it in t …17th Jun 2026 -

Kite Academy: Control Bar Rigging and Safety Systems
Welcome to episode three of the Brazilian Brothers and MACkite Kite Academy. The Brazilian Brother …15th Jun 2026