

Tips for Learning How to Parawing
Parawing has officially hit the market, offering an exciting new way to engage with your foil and the wind. A lot of wingers are seeing these parawings and deciding they want to give it a try. Jeff and Tucker have put together some essential tips to help you learn how to parawing. These tips are predominantly geared toward riders who are already foiling — whether you're coming from a SUP or winging background, having that baseline foil experience makes the progression much more natural.
Tip 1: Picking the Right Conditions
Picking the right conditions is massive. You don't want to go out when it's super light, and you definitely don't want to go out when it's nuking with crazy overhead waves. Ideally, you want good steady wind — somewhere in the 16 to 24-knot range, depending on your wing, board, and foil. Flat water is your best friend here; adding swell isn't impossible, but it complicates things significantly.
When you were learning to wing foil, you needed moderate wind, and the same applies here. However, you want to avoid overly gusty conditions. A parawing is much more sensitive to power than a wing because there's absolutely no depower. For most average-weight riders, finding a sweet spot between 17 and 23 knots is perfect. It's totally worth driving an extra 20 minutes to find flat water and smooth wind to make your life easier.
Beach Flying Practice
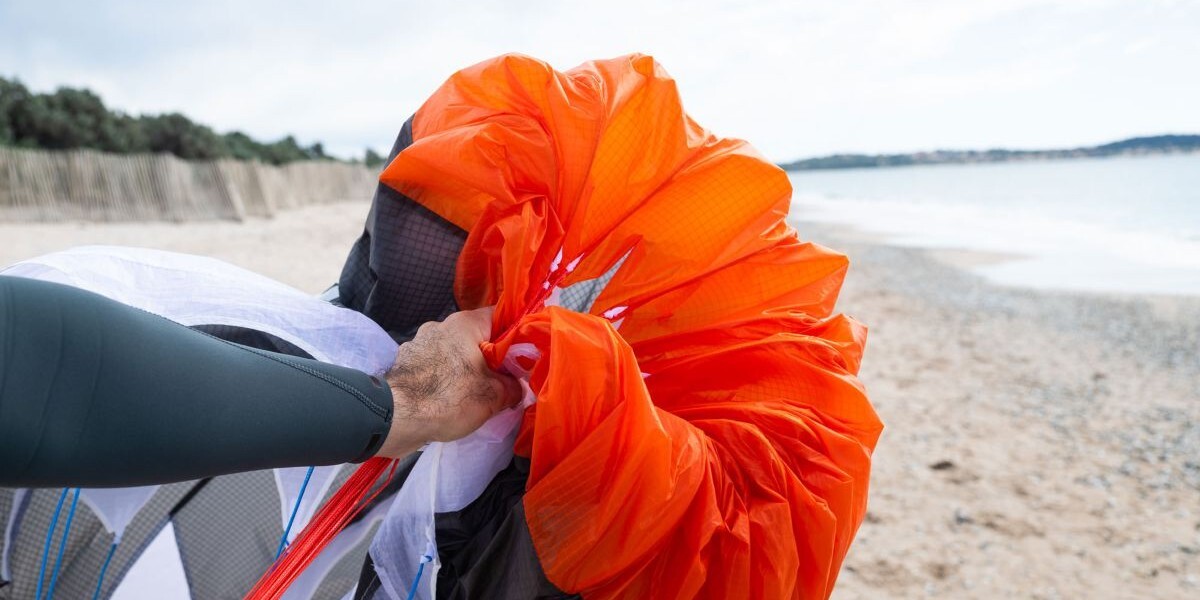
If you show up to the beach and the wind is on the lighter side, you can definitely play with the wing on the beach. This is a tip you absolutely need to do. You're isolating a new skill, and flying a parawing is very different from flying a standard wing. Spend some time on the beach in a good breeze to find that sweet spot. Figure out where you want your hands, practice stowing it (collapsing and releasing it repeatedly), and see how it reacts. Wadding it up and throwing it back out on the beach is highly beneficial — there's a lot more handling involved with a parawing than a standard wing.
Tip 2: Plan a Downwinder
Planning a downwinder is your friend in this sport when you're learning. Upwinding is a real challenge when you're overpowered, and at the same time, you need pretty good power to get on foil when you don't fully know what you're doing. It's a conundrum — you want enough power to get up, but once you build that apparent wind and compound your speed, you get overpowered very quickly. This is especially true when you aren't confident enough to lay into it and edge hard upwind to kill some of that board speed.
During Tucker's first session, he went out with too big of a wing, too small of a board, and too small of a foil. He ended up getting dragged around like he was hooked to a semi-truck. He could get up, pack it down, and ride waves, but walking it back upwind was out of the question. Planning a downwinder saves you from the headache of the "walk of shame."
This doesn't mean you have to do a 20-mile open ocean run. A downwinder can just be heading a quarter-mile or a mile up the beach. Give yourself the space to know you're going to go downwind. Park a car at your endpoint, or have someone drop you off higher up the beach. Expect to walk with your gear if you don't plan ahead.
Tip 3: Gear Sizing (Wing, Board, and Foil)
As you gain experience, your range will broaden, and you'll be able to ride upwind while overpowered or ride underpowered. But for your first few sessions, your gear choices need to be dialed in.
Parawing Size
A general rule of thumb is to use a parawing similar to what you'd use for winging in those same conditions, or perhaps a half-meter smaller. If it's 5m winging conditions, a 4.5m or 5m parawing will work fine. Don't make the mistake of grabbing a 3.5m parawing in 5m conditions just because you're worried about being overpowered. You still need enough power to get up on foil. You'll be overpowered once you're up, but at least you'll get the practice of getting up and riding.
Board Volume and Shape
The board is a major factor. A lot of people getting into parawing are already winging and might be riding a low-volume sinker board. A sinker works for powered parawing, but you need a lot more power from the wing to learn on it. For most riders, the best suggestion is to use a larger, mid-length board. It's more efficient, larger, and allows you to ride a slightly smaller parawing so you aren't immediately overpowered once on foil.
A good benchmark for board volume is your weight in kilograms, plus or minus 5 liters. This is subjective based on the board's shape. If you have a long, narrow, thin board (like the KT Arc), you can size down a bit closer to the negative 5 or 10L mark because it doesn't have a lot of thickness to fight. If you have a really narrow, thick board, you might want to size up to gain more stability.
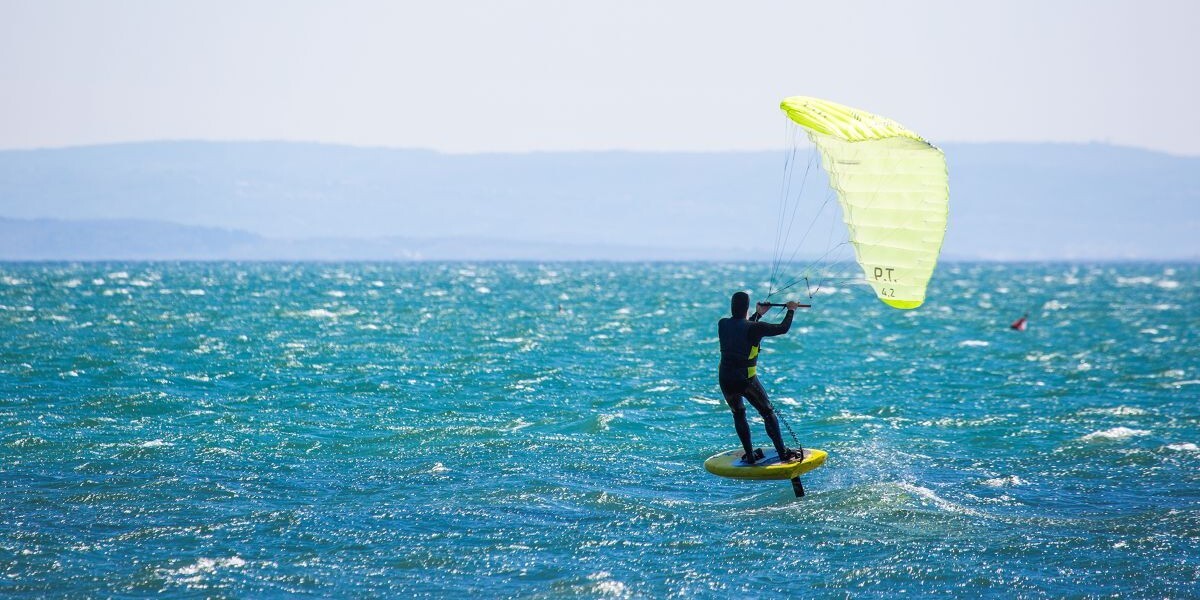
Unlike a standard wing — which lets you do a pull-up to lift yourself onto the foil or use the wing to balance — a parawing pulls horizontally. It pulls you straight forward, much like a wakeboard boat, and provides very little vertical lift, even if you bring it above your head. Because of that, you need to build board speed on the water to lift off, making a larger, more efficient board crucial for learning.
Hydrofoil Size
Size up your foil for your first sessions. Use the foil you'd normally use for light-wind winging. If you normally ride an 1100 to 1400cm2 foil in light wind, use that. Don't jump straight onto a tiny high-aspect foil or a dedicated downwind paddle foil. You want something in the semi-high aspect range (around 7 to 9 AR). It needs to be efficient, but still large enough to provide great low-speed lift and stability. A massive 2000cm2 foil with a 4" thickness isn't ideal either, but a modern, efficient light-wind foil is perfect.
Tip 4: Patience and Getting Up on Foil
Patience is mandatory. When you put that parawing in your hand and get out on the water, it can be frustrating. You're going to get it handed to you. The wing will go in the water, it'll get twisted up, your lines and bar will get tangled, and you're going to get wet. Take a deep breath and enjoy the journey.
If the wing goes in the water, be patient. Straddle your board like you're on a horse, put the wing on the front of your board, and get the leading edge up. Untangle everything, pitch it downwind, and get it rolling again. Don't rush yourself into trying to get back up on the board immediately.
How to Get Up
Getting up is a process. Start by laying prone with the wing in the air, holding it with your downwind hand. Scooch up to your knees, keep the wing flying, and then use one hand to pop up onto your feet while flying the wing with the other.
Once you're up on your feet with good power, leave the wing alone. Find the sweet spot and pump the board. You'll want to aim the board a little more downwind than you would when winging to build that apparent wind. Let the wing fly smoothly. Don't jack the wing too hard—if you pull too hard, it deforms and you lose power. It'll just jellyfish on you. Also, don't pull back on the wing like you would with a kite, or it'll backstall and fall straight into the water.
Safety First
Because this sport can go wrong quickly, safety needs to be a priority:
- Wear a quality leash: Always wear a reliable leash, but remember that leashes can break. The wing isn't a flotation device—once it hits the water, it becomes a wet blanket.
- Have a Plan B and Plan C: Know your exit strategy and where you're headed downwind.
- Never ride alone: Always have a buddy on the water, or someone keeping an eye on you.
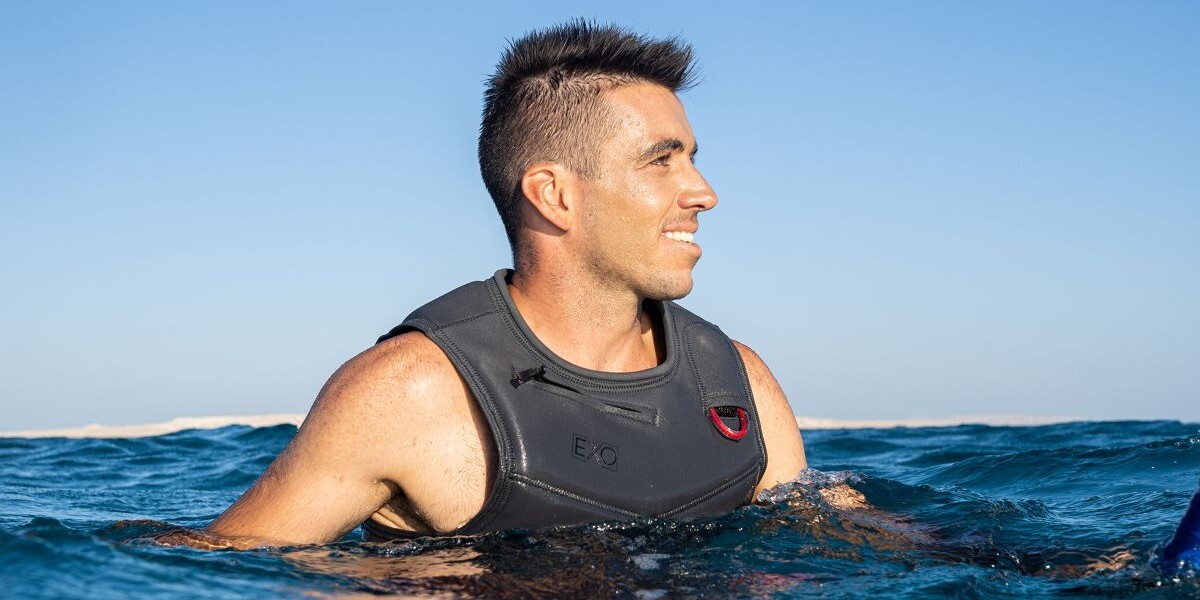
- Two points of flotation: Always have your board and a secondary form of flotation, like an impact vest or inflatable PFD.
Give yourself enough space, wait for the right wind, use enough volume in your board, pick the right foil, and practice patience. Put all these tips together, and you'll set yourself up for a highly successful first parawing session.
The MACkite Take
Parawing rewards preparation in a way that's pretty different from winging. The four big levers are conditions, downwinder planning, gear sizing, and patience, and getting any one of them wrong can turn a session into a slog.
- Aim for 17 to 23 knots of steady wind over flat water, even if it means driving 20 minutes further. Plan a downwinder so the walk of shame is off the table from the start.
- Size your gear toward forgiveness: a parawing close to your winging size (or a half-meter smaller), a mid-length board around your weight in kilos plus or minus 5 liters, and a light-wind winging foil in the 7 to 9 AR range.
- And spend real time on the beach getting comfortable with the wing's handling before you ever put a foot on the board — it's a different animal from a standard wing, and that practice pays back instantly.
- On the water, the parawing's biggest mental adjustment is that there's no depower and almost no vertical lift. It pulls you straight forward like a wakeboard boat, so board speed (not the wing's lift) is what gets you on foil. Once you're up, let the wing fly smoothly — don't jack it, don't backstall it, just find the sweet spot and pump the board with the nose pointed a touch more downwind than you'd aim winging.
- And take safety seriously: a leash that can break still needs to be a quality one, a Plan B and Plan C are non-negotiable, and a buddy plus two points of flotation should be the default. Dial those things in, and the learning curve gets a lot friendlier.
MACkite Subscription Links:
YouTube | Instagram | Spotify Oddcasts
Contact MACkite Below:
800.622.4655 | Kiteboarder@MACkite.com | LIVE Chat Messenger

Recent Posts
-

Cabrinha Switchblade Design Works: First Impressions
The Brazilian Brothers are back in Brazil for the 2026 windy season, and it's officially on. With …16th Jul 2026 -

Light Wind Parawinging: Tucker's Top Tips and Favorite Gear
Tucker has been getting a lot of questions lately about light wind parawinging. He put together a …15th Jul 2026 -

How to Choose the Right Foil Mast Length
Jeff and Tucker dive into a majorly important part of the foil setup: the mast. With foiling exper …14th Jul 2026