

How to Dockstart a Foil | A Step-by-Step Pump Foiling Guide
Whether you've been watching dock start videos on repeat or you've already face-planted into the water a few times, this guide is for you. Dockstarting a foil is one of those skills that looks deceptively simple from the shore, and then humbles you fast once you're actually standing on the dock.
The good news? It's highly learnable, and the progression curve gets a lot friendlier once you understand what actually matters. Here's everything you need, from dialing in your gear to the pumping technique detail almost no one talks about.

Gear Setup | Getting Your Foil Dialed Before You Hit the Water
If your setup is off, nothing downstream will work. This is the foundation.
Mast Length
The sweet spot for pump foiling is 70–85 cm. This range keeps drag low while giving you enough flight height to pump efficiently. Go too short, and you'll be fighting touchdowns. Go too tall and drag becomes your enemy.
Mast Positioning on the Track
- Center of the tracks is your starting point
- Moving the mast forward shifts more weight demand to your front foot
- Moving the mast backward loads your back foot more during sustained flight
Fuselage Length
Aim for 60–70 cm. This range balances stability with enough maneuverability to pump fluidly without the foil feeling like a barge or a twitchy mess.
Front Wing Size
- New to foiling entirely? Go with a high-aspect front wing above 2,000 cm². The extra lift gives you more time to figure out balance before you run out of speed.
- Already foiling with a wing, parawing, or kite? The 1,700–2,000 cm² range is a solid starting point.
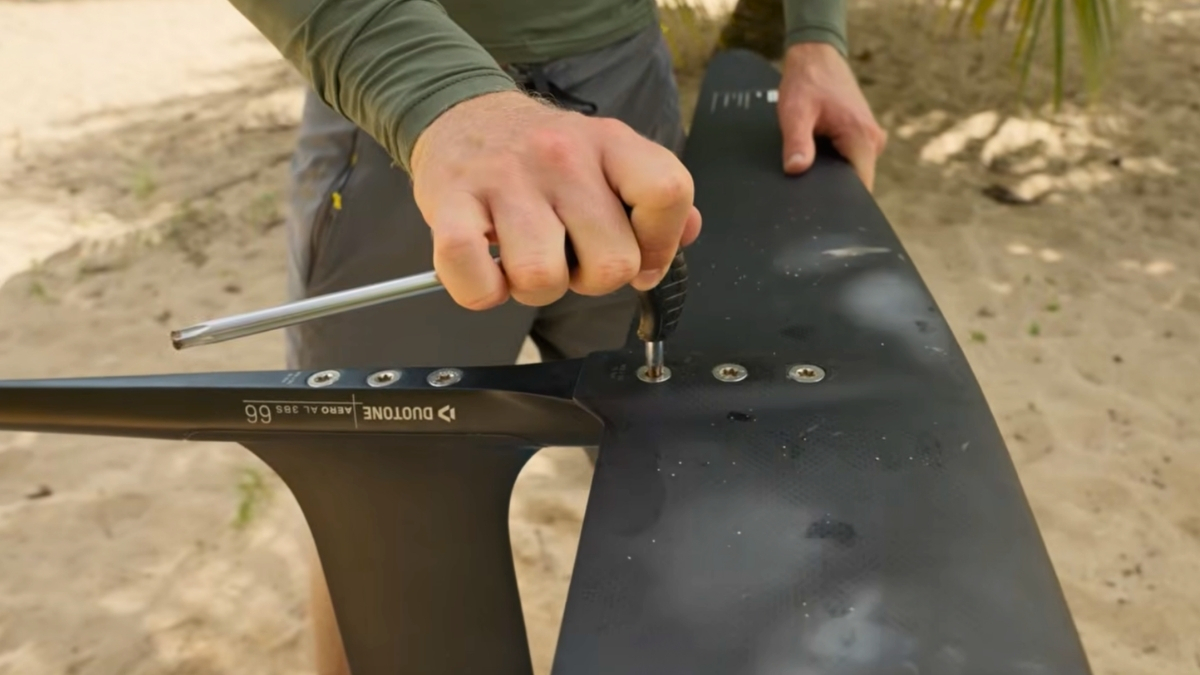
Pre-Launch Check
Before you walk out to that dock, tighten every screw. All of them. A foil that comes loose mid-pump is a bad time.
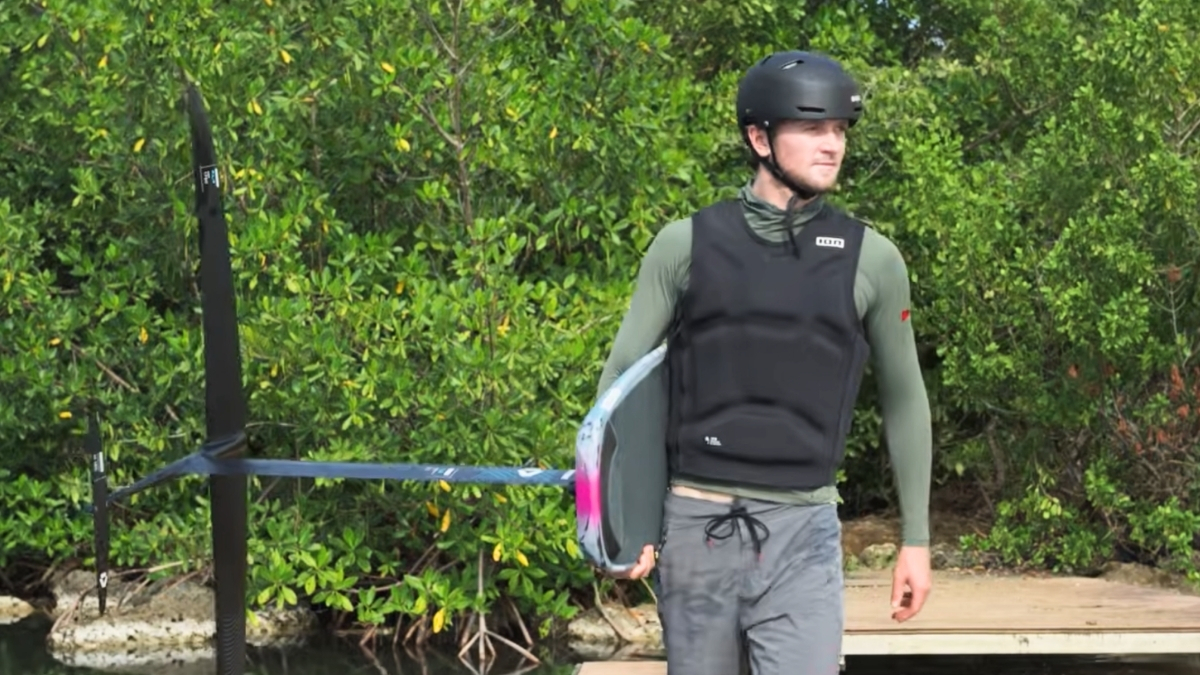
Safety | The Part You Don't Skip
Pump foiling is relatively low-risk compared to wake foiling, kite foiling, or wing foiling, but a carbon foil is still a carbon foil. Respect the gear.
Personal Protection
An impact vest and helmet are strongly recommended when you're learning dock starts. Beyond the obvious protection, they do something else—they make you feel more confident jumping onto the board those first few times. That confidence matters.
How to Fall
When you feel yourself losing balance, don't fight it. Let yourself fall in the same direction the board is going. Fighting the fall is how you make foil contact. Going with it usually means a clean splash.
Spot Selection Checklist
- No swimmers within 30 meters in any direction
- Water deep enough at the dock and everywhere the board might travel
- No boats tied up nearby
- Check for hardware and attachment points sticking out from the dock
- Wet wooden docks get slippery fast, so factor that into every run-up
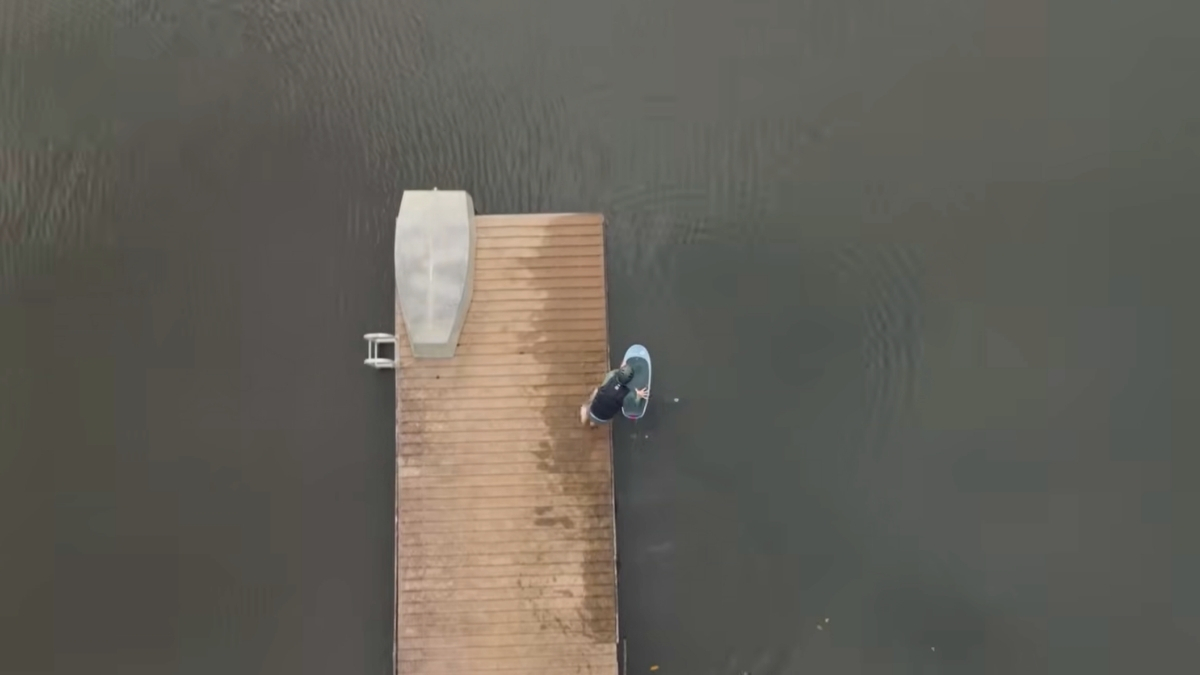
Finding the Right Dock | Your Environment Is Half the Battle
Not all docks are created equal. Choosing the right one early in your learning process can significantly reduce your learning time.
What to Look For
- 2–3 meters of run-up space that lets you approach with your chest facing the water
- Dock height around 2/3 your mast length. This is the sweet spot. Low docks are technical and unforgiving. Higher docks give you more hang time between the jump and the water, which gives you more time to get your feet sorted and start pumping.
- Deep water underneath. Never dock start over shallow water.
- A dock that lets you pre-place the foil in the water before your run-up, which makes the whole sequence smoother
- Watch for poles or structural elements at the dock's end that could catch your foil
Stance Awareness
Are you regular or goofy? Not every dock gives you a clean run-up in both directions. Scope it out before you commit.
Pre-Start Practice | The Moves That Build Muscle Memory
A few minutes of dry-run practice before your first real attempt pays off more than most people expect.
Walk-Through Simulation
Walk the run-up path two or three times. Place the foil on the water and physically rehearse the steps: where your feet go, how many steps you're taking, what your hands are doing. Three to five run-up steps is typically enough to generate usable speed.
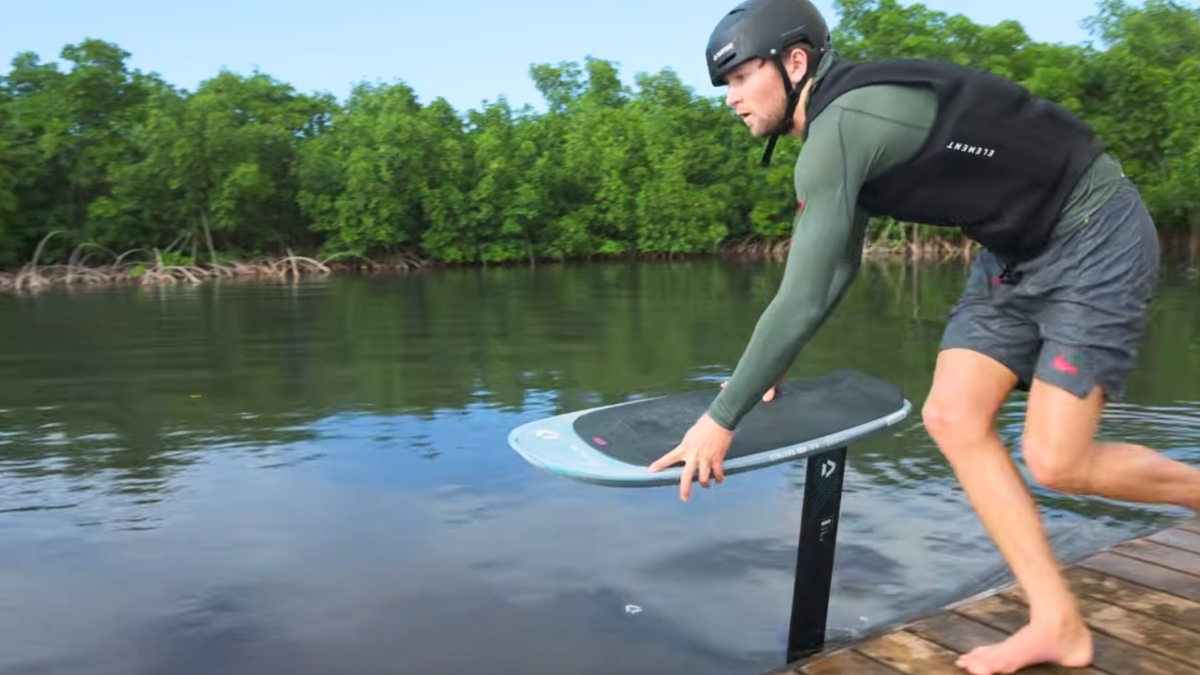
Board Grip
- Front hand: hold the heel-side edge near the nose
- Back hand: hold the toe-side edge near the tail
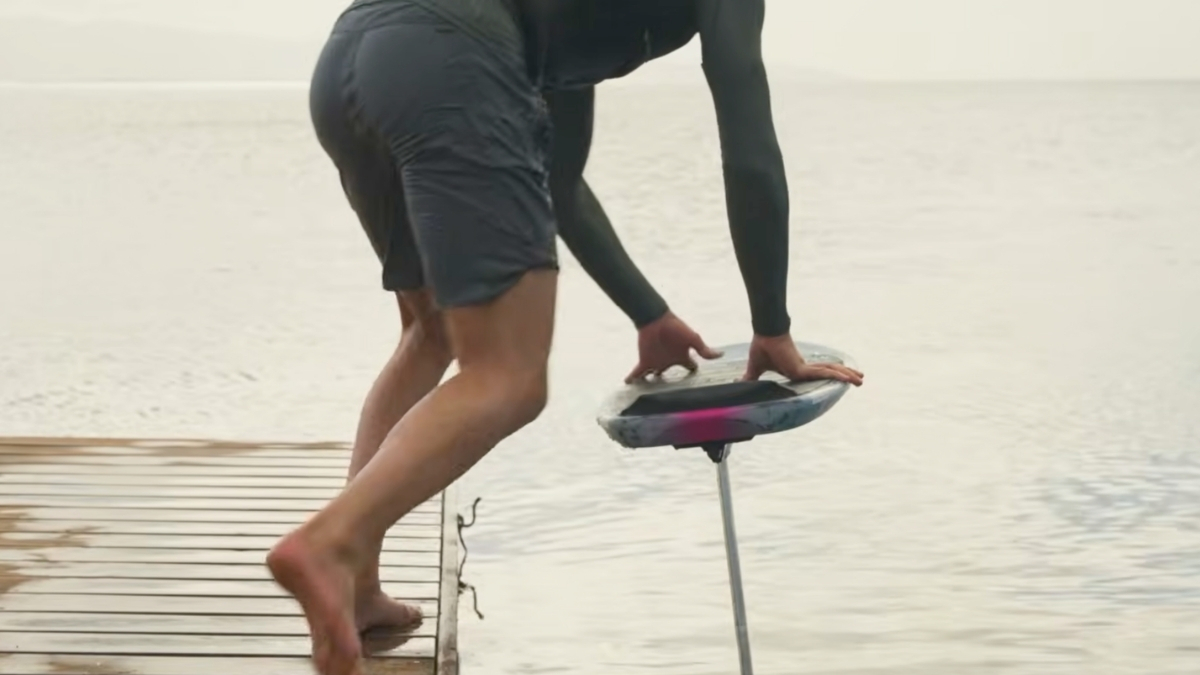
The Belly Start
This is a great drill for getting a feel for the foil's glide before you try standing up:
- Take your run-up steps and jump forward onto your belly while keeping both hands on the board
- Position yourself slightly forward to get weight toward the front of the foil
- Glide for a few meters, stand up if you can, and repeat
It feels a little goofy, but it builds real feel for how the foil behaves underfoot.
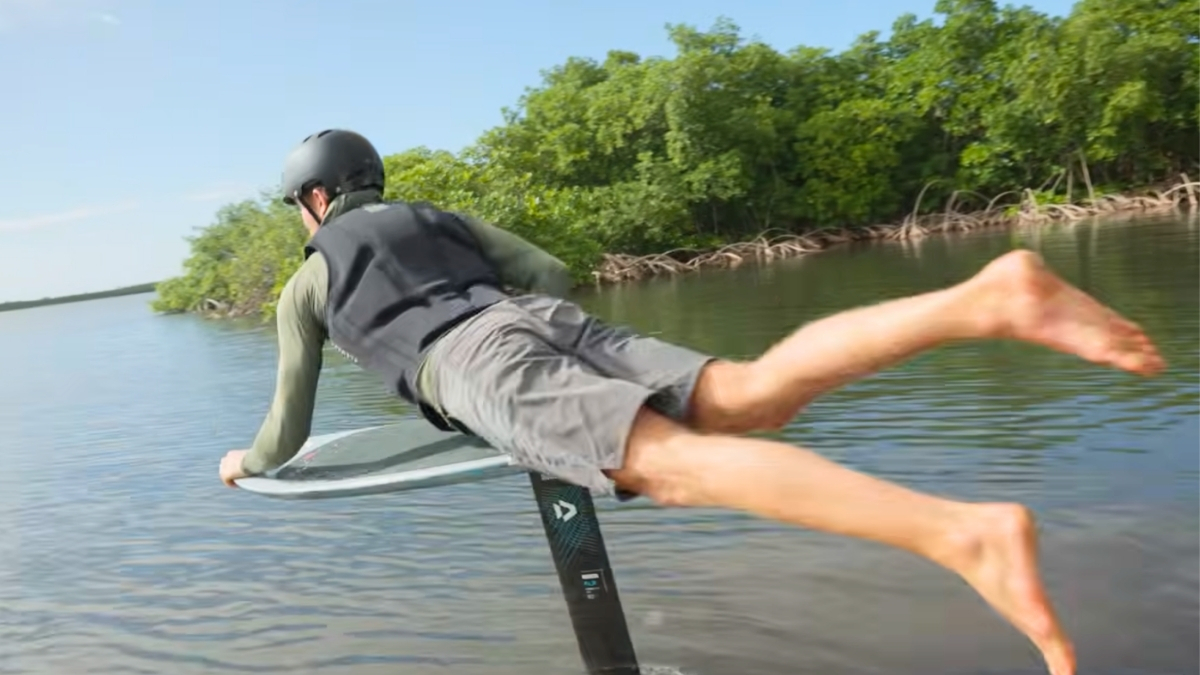
The Running Start | Getting Up on Foil
This is where the learning curve lives. It takes patience and consistency, but once it clicks, pump foiling opens up in a serious way.
Step-by-Step
- Place the foil in the water and position yourself for the run-up
- Hold the board with both hands using the grip described above
- Take three to five steps, pushing the nose of the board slightly downward as you go. The foil will start generating lift during the run.
- Keep the board as flat as possible; don't let it angle upward
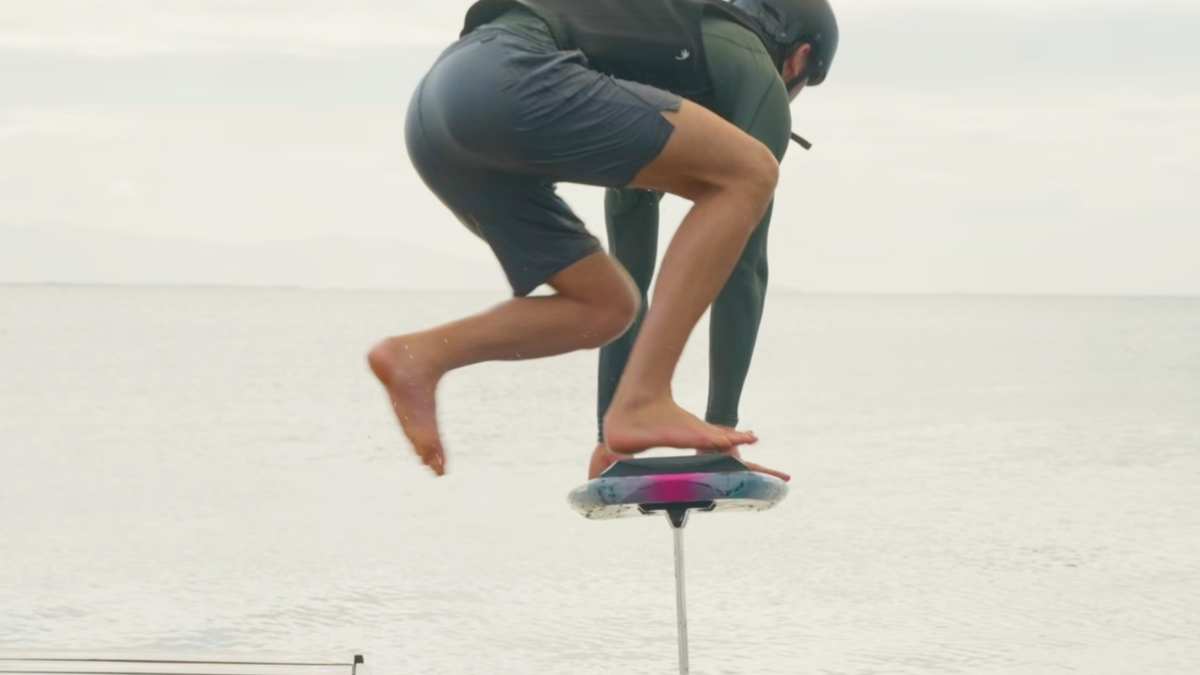
- At the end of the dock, jump with your back foot first, then immediately follow with your front foot
- Keep both hands on the board through the jump
- Once your feet land, release your hands and center your stance for stability
- Start pumping immediately. Push down with your back leg to drive the foil up, then push the nose back down with your front leg.
- Keep your upper body upright and forward over the nose to maintain momentum
- Use your arms to help establish rhythm
Keys to a Clean Start
- Maximum speed out of your run-up steps
- Board stays flat during the approach; don't let the nose climb
- Hands on the board until you're airborne
- Get into pumping rhythm the moment you land
Pumping Efficiency | How to Actually Stay Up
Getting on foil is one thing. Staying there is the real skill. This is where pump foiling becomes almost meditative when you get it right.
Fundamentals
- Fly high on the foil. This reduces drag and keeps you away from touchdowns.
- Aim for a rhythmic, steady cadence rather than aggressive, exhausting bursts
- Learn to feel the glide between pumps and use it. Pausing for a beat during the glide is how you conserve energy and extend rides.
The Hopping Mental Model
Stop thinking about it as "pumping up and down" and start thinking about it as hopping. The upward push happens naturally on the way up. The glide and forward speed builds on the way down. This shift in mental framing changes how your body executes the movement.
Feet Position
As you get more comfortable, move your feet closer together. It sounds counterintuitive, but it distributes the workload more evenly between both legs instead of hammering your back leg into fatigue.
Arms
Use your arms actively for rhythm and forward drive. They're not just along for the ride. They help keep you moving through the air and prevent the upper-body stiffness that kills glide.
The Detail Almost Nobody Talks About
You can dial in your setup, nail the dock start, and develop decent pump rhythm, but this is what separates short hops from genuinely long, smooth glides.
It's not about pumping harder. It's about unloading the foil at the right moment.
If you stay too heavy on the board through the entire pump cycle, you're actively killing your glide. But if you slightly unweight at the top of each pump, the foil keeps flying with dramatically less effort. The foil wants to fly—your job is to let it.
Most people focus on the downstroke. The real magic is in that brief moment of lightness at the top.
Key Takeaways
- Mast length 70–85 cm keeps drag down without sacrificing pump height
- Front wing 1,700–2,000+ cm² is the right starting range depending on your foiling background
- Dock height matters. Aim for 2/3 your mast length for the best learning environment.
- Belly starts build essential foil feel before you commit to standing
- Keep the board flat during your run-up approach; don't let the nose ride up
- Jump back foot first, hands on board until airborne, then get pumping immediately
- Think hopping, not pumping. It changes your body mechanics in the right direction.
- Unweight at the top of each pump. This is the detail that unlocks longer, easier glides.
Ready to Get Into Pump Foiling?
Whether you're eyeing your first foil setup or looking to upgrade to something more pump-friendly, the MACkite team rides this stuff and can point you in the right direction.
Drop us a line at Kiteboarder@MACkite.com—we're happy to talk gear, technique, or help you figure out what setup makes the most sense for where you're at.
Recent Posts
-

Light Wind Parawinging: Tucker's Top Tips and Favorite Gear
Tucker has been getting a lot of questions lately about light wind parawinging. He put together a …15th Jul 2026 -

How to Choose the Right Foil Mast Length
Jeff and Tucker dive into a majorly important part of the foil setup: the mast. With foiling exper …14th Jul 2026 -

Adam Bennets' Ideal FLUX Setup for Fliteboard eFoils
Tucker is joined by Adam Bennetts from FLITElab to walk through some of the FLITElab wings and how …13th Jul 2026