

North Navigator Pro Quick Release | How to Swap Yours Out With Ease
What You Need
Before starting the replacement process, ensure you have all the necessary tools and parts. Here’s what you’ll need:
- Multi-grips
- 2.5 mm Allen key
- Drift punch (less than 4 mm or 1/4 inch, ideally 3 mm)
- A 3D-printed jig (optional, but helpful)
Step-by-Step Replacement Process
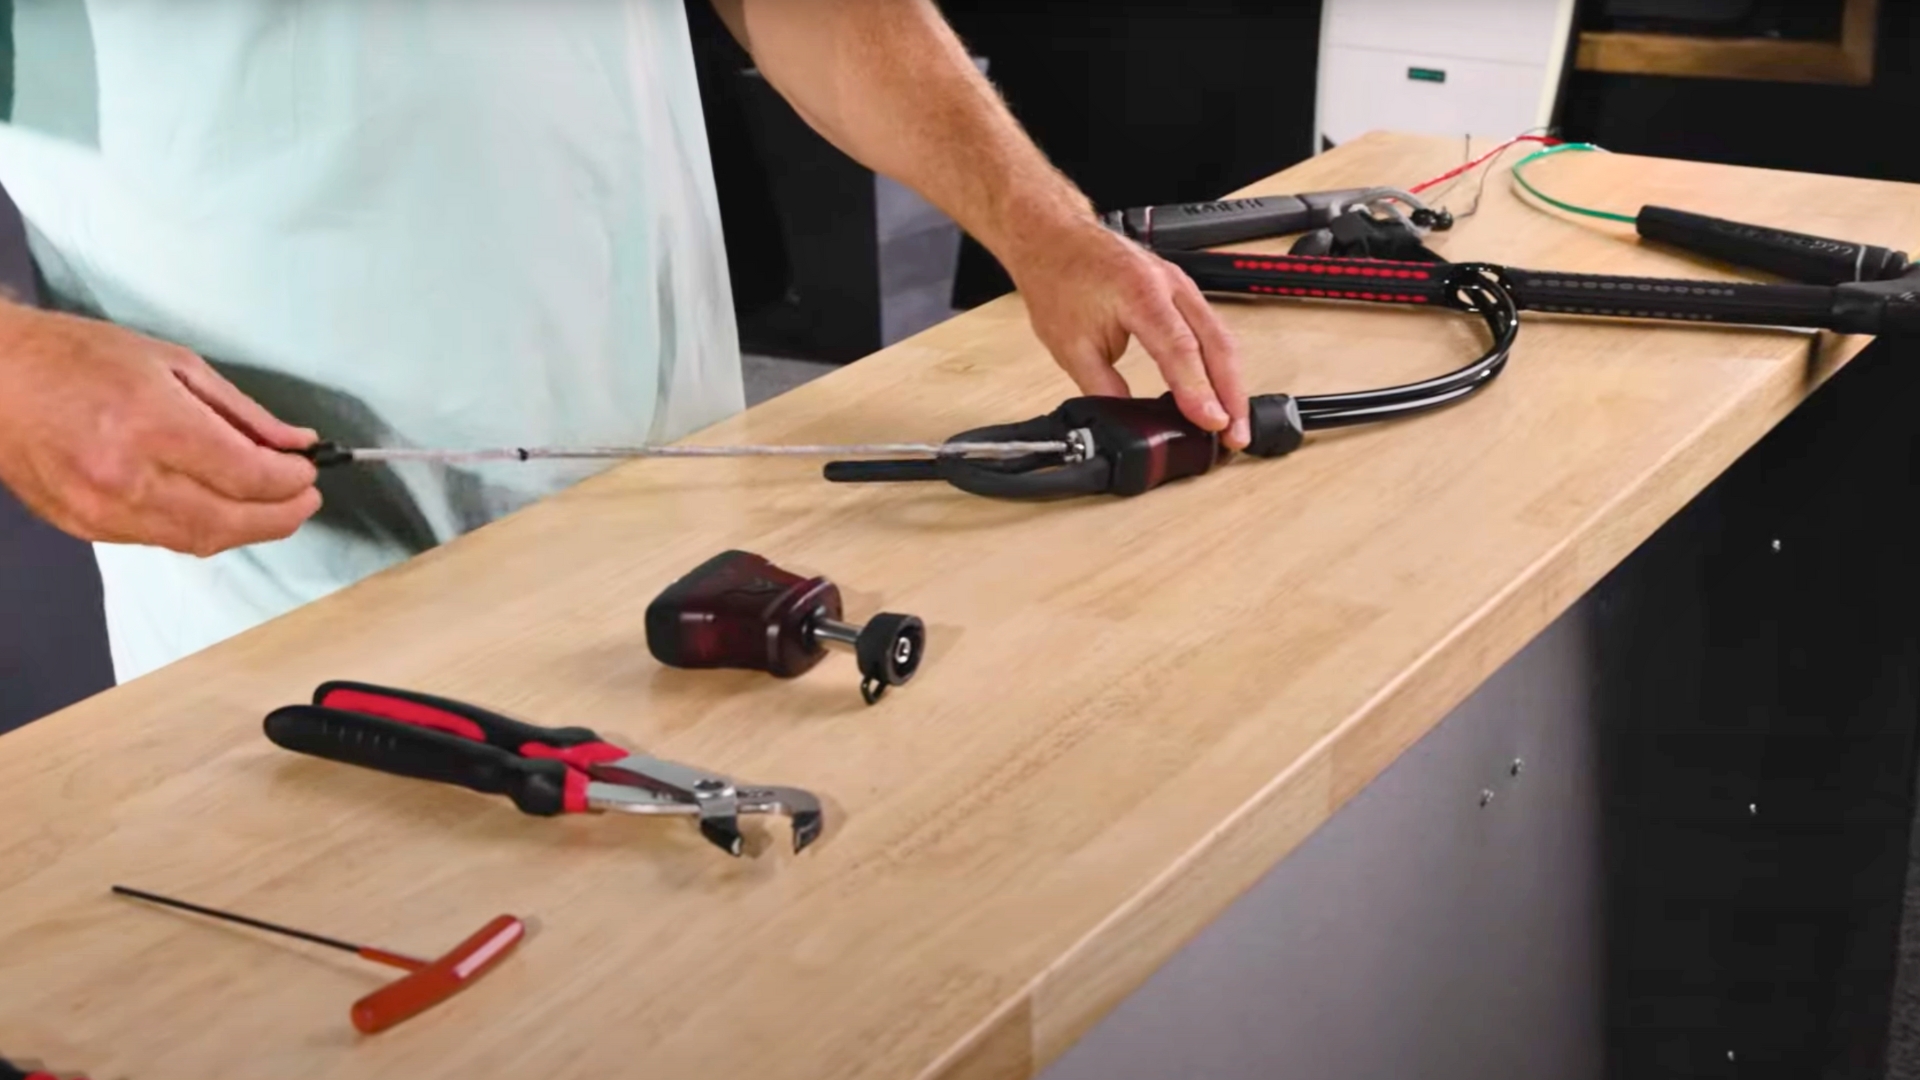
Step 1: Prepare the Control Bar
First, lay out your control bar and run the lines out fully. Locate the end of the landing line, grasp it, and pull through until you reach the loop-to-loop connection with the flying lines. Detach these loops and continue to pull the landing line until it is completely free. Set this aside temporarily.
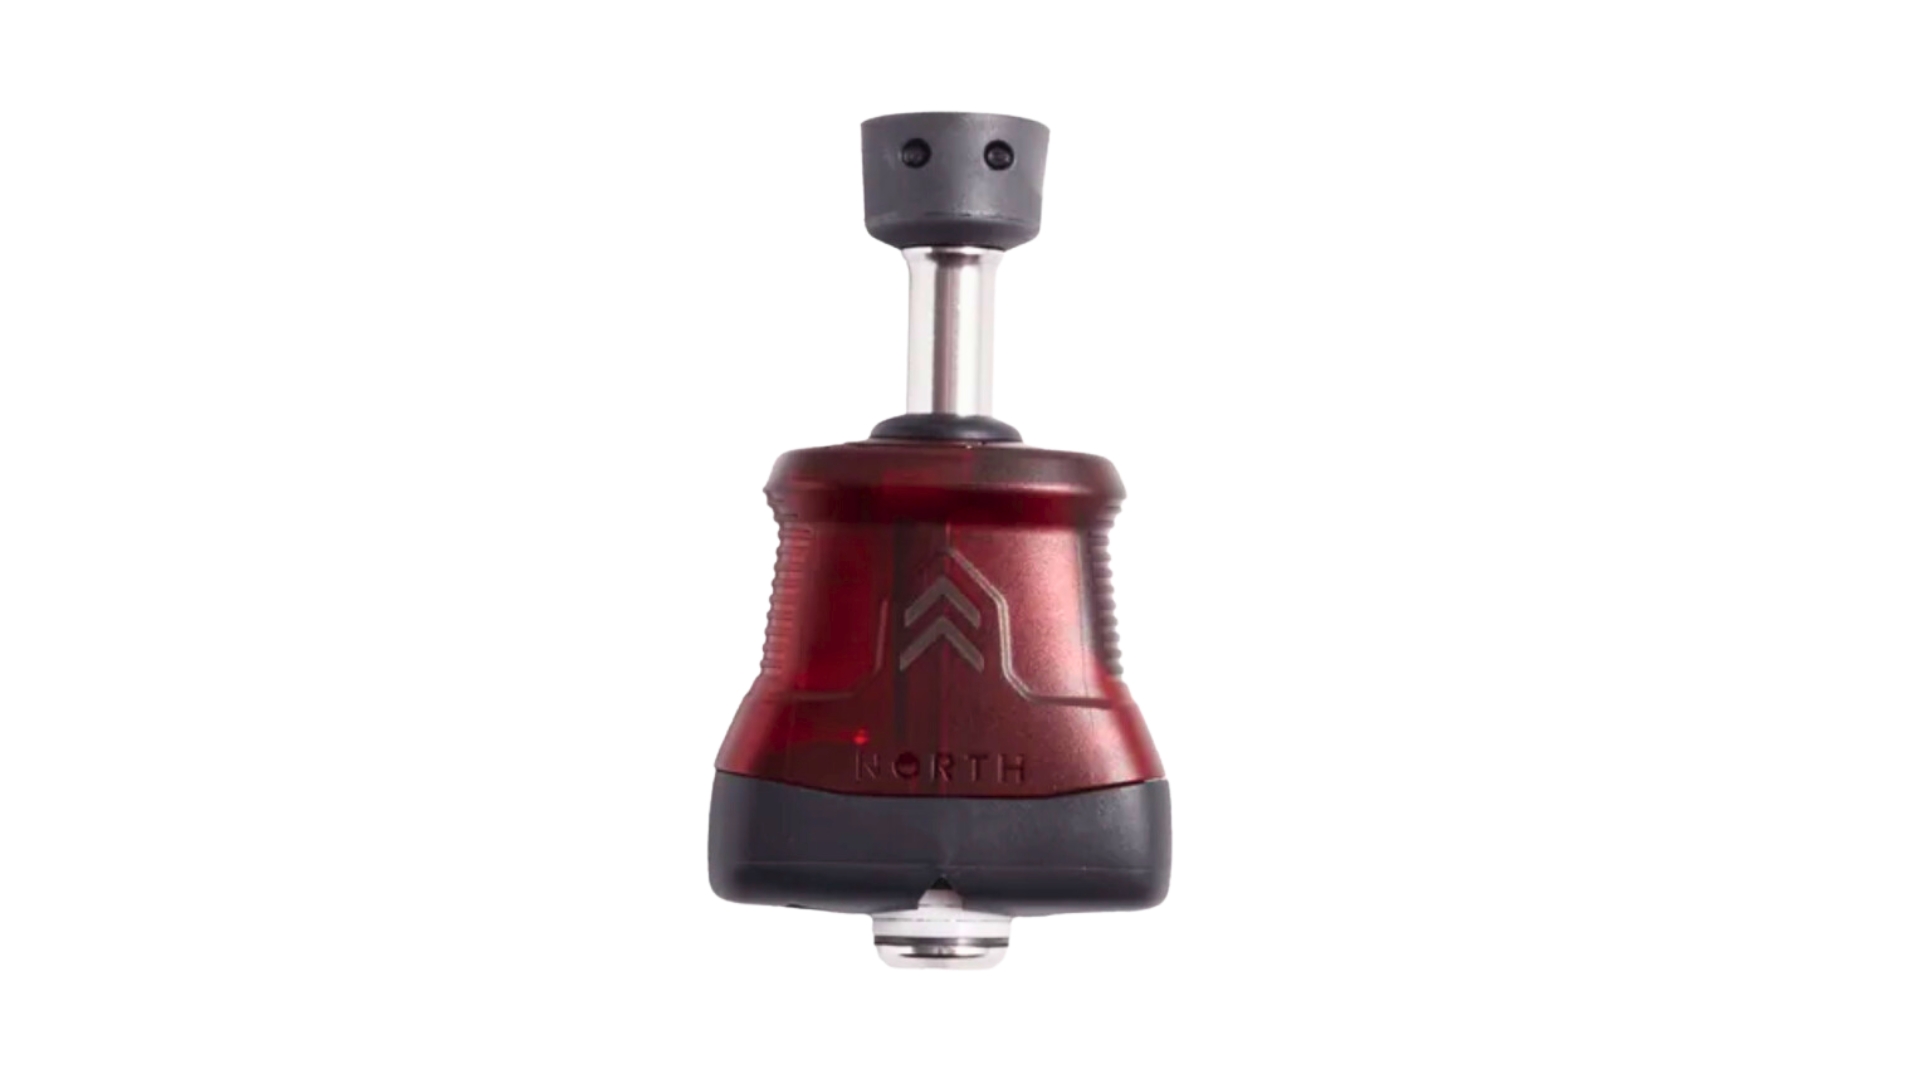
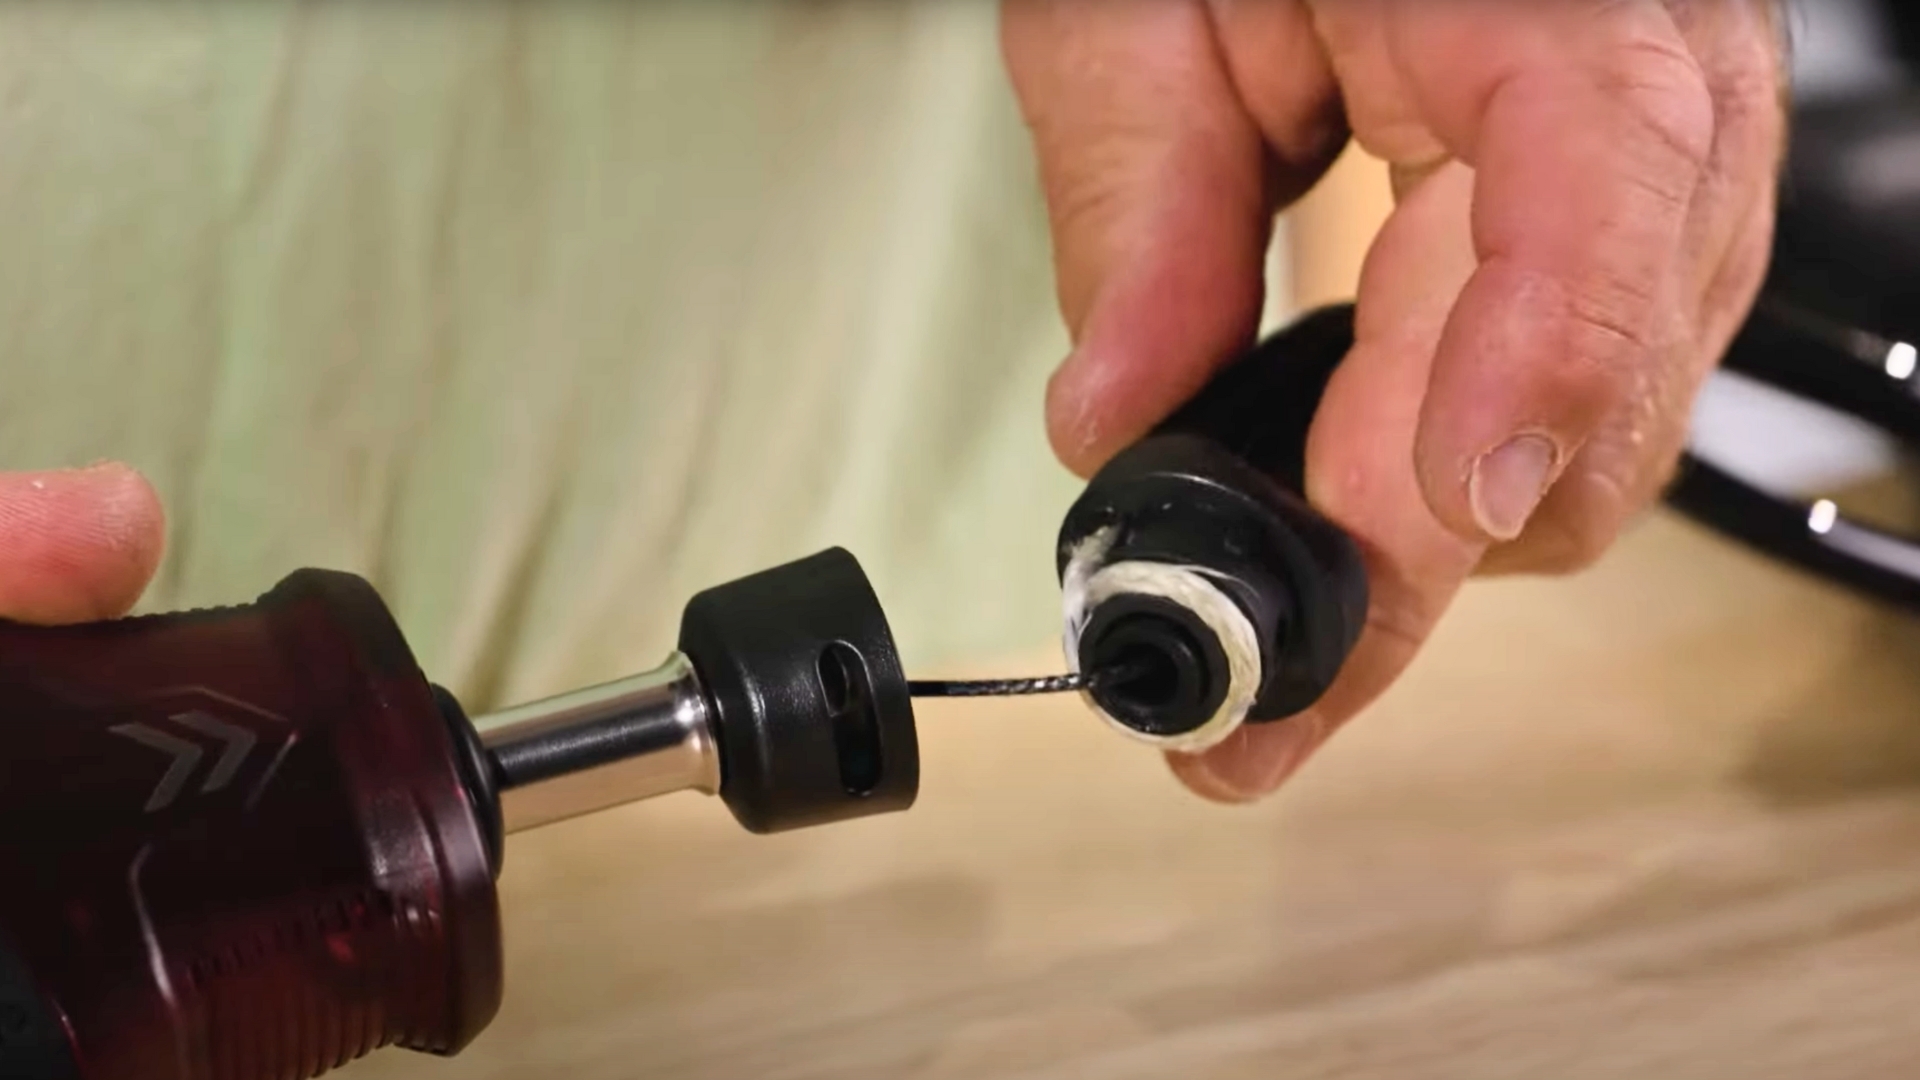
Step 2: Dismantle the Old Quick Release
Attach the flying line’s end to your harness loop to prevent it from moving. Place the top of the spinning handle into the jig (if you have one) and align it properly. Use your drift punch to push out the nail pin from the spinning handle. The pin should have small dimples that help keep the tool in place. After pushing the pin out, wiggle the components apart and set them aside.
Step 3: Install the New Quick Release
Take the new QR and align the slots on the shaft with the holes in the spinning handle. Thread your flying line through the center of the QR, ensuring that the small key on the QR aligns correctly with the top and bottom of the spinning handle. Push the components together and secure them back in the jig. Insert the dual pin into place.
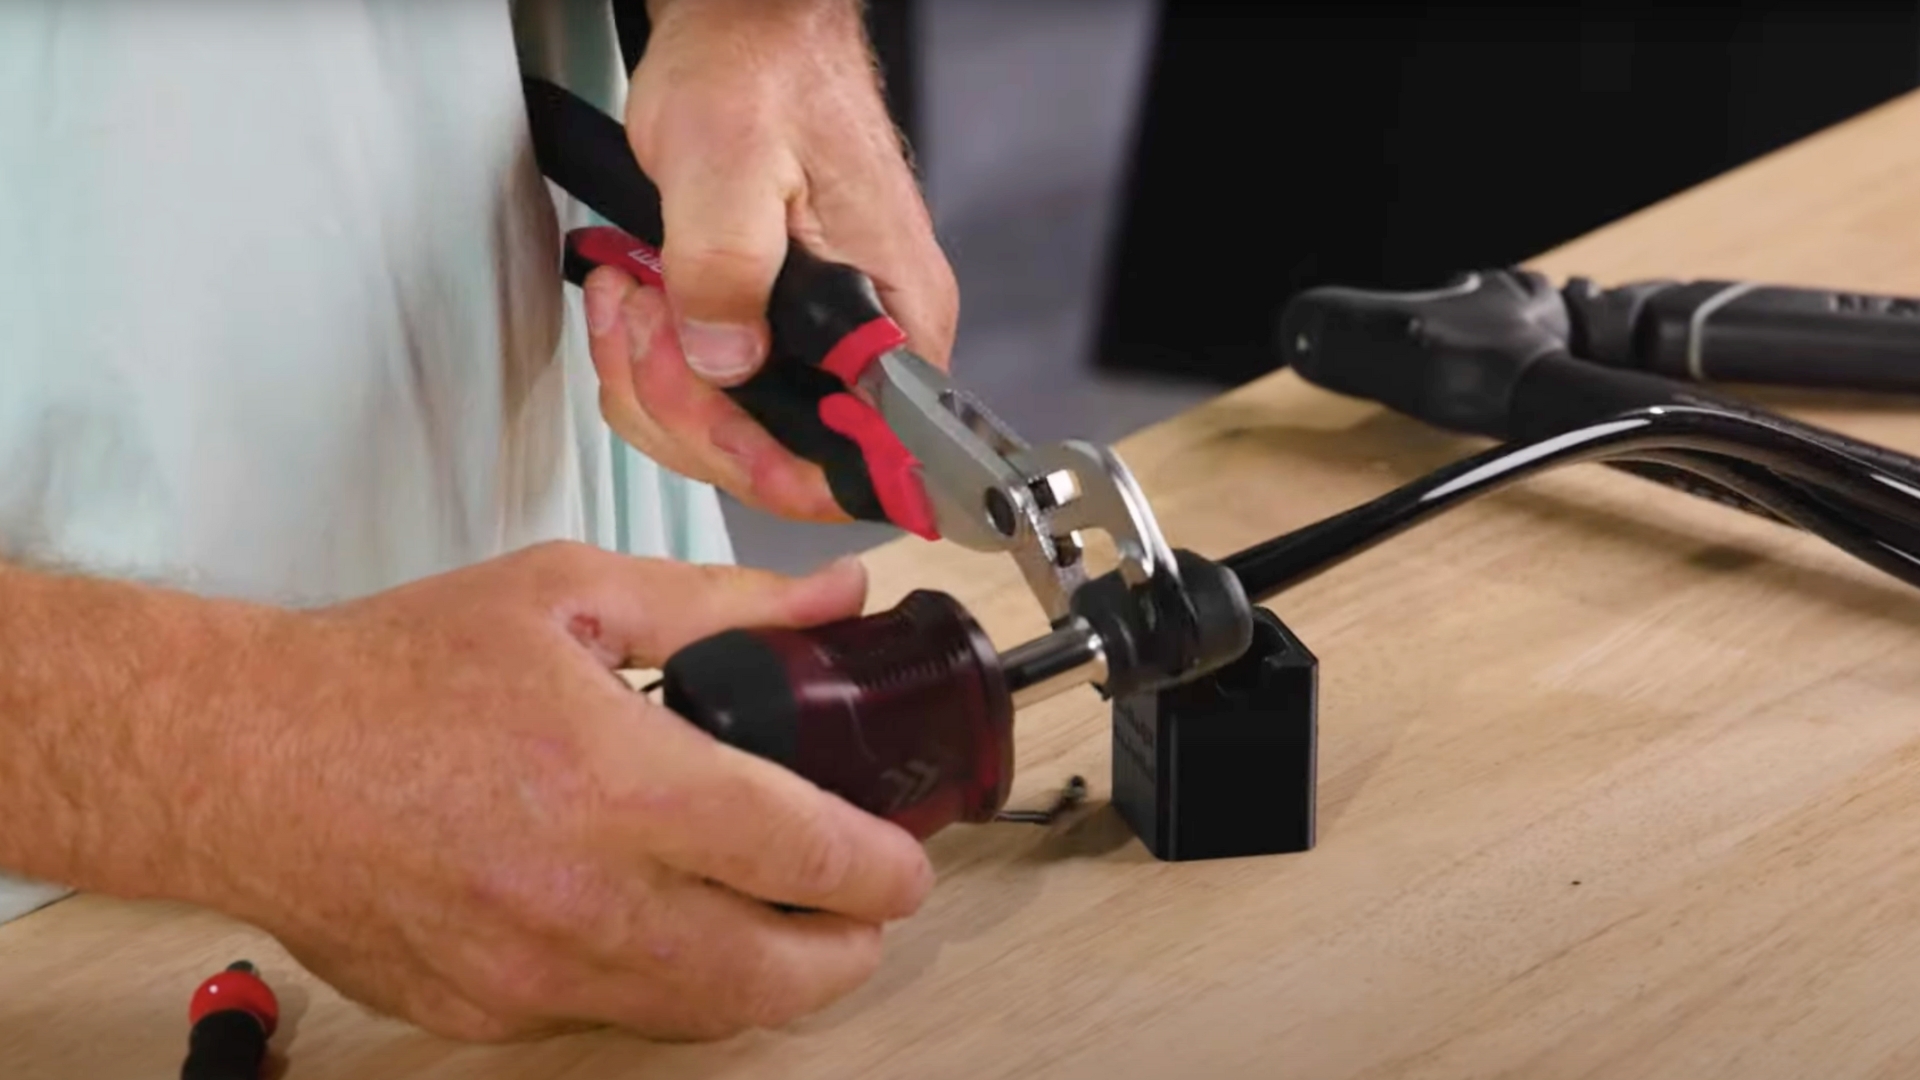
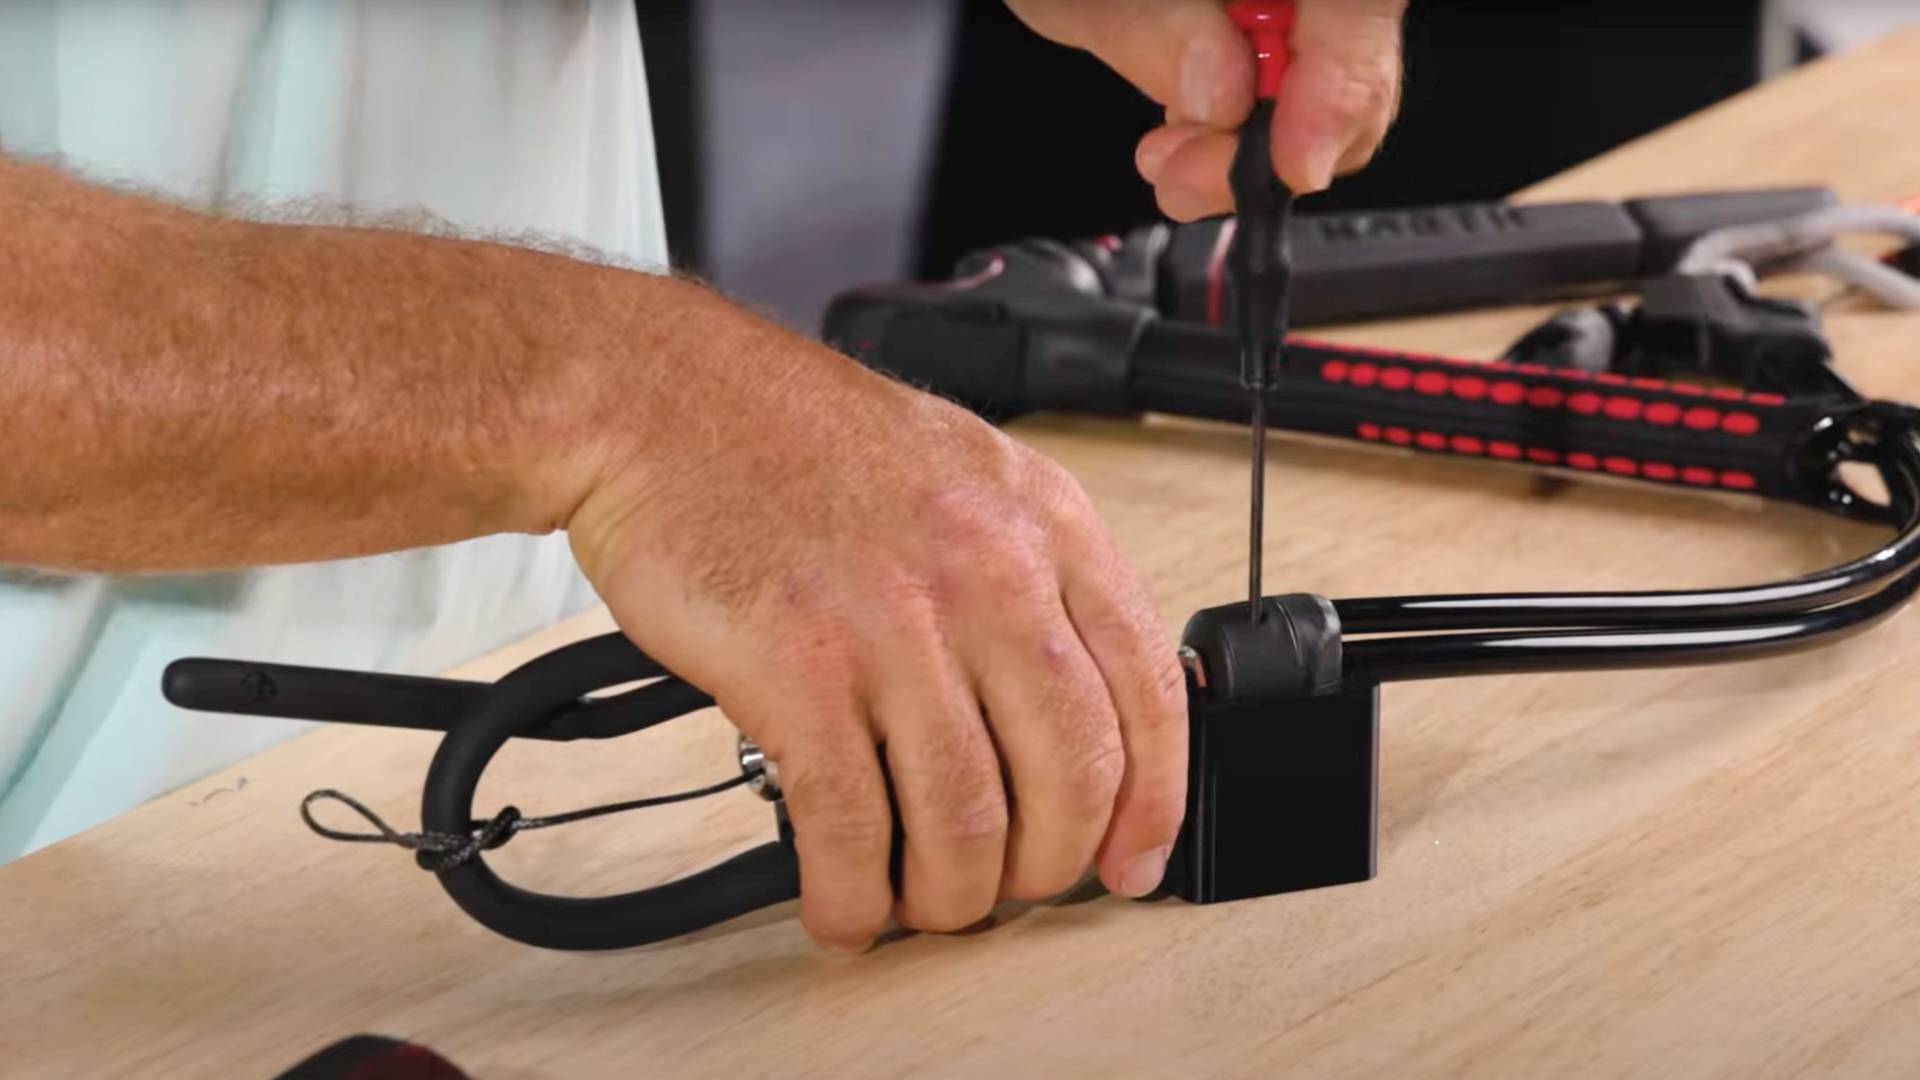
Step 4: Secure Everything
Use the multi-grips (wrapped with tape to avoid damage) to firmly drive the pin into place, ensuring it is flush with the handle. There should be a small gap (about 0.5 mm) to keep it spinning freely.
Step 5: Reconnect the Landing Line
Reattach the landing line by feeding it through the loop and ensuring the loop-to-loop connection is as small as possible. Remove any twists, pull it tight, and then pull on your flying line to reintegrate the landing line.
Step 6: Final Adjustments
Replace the old harness loop if necessary. Then, focus on the Quick Release itself. Use your 2.5 mm Allen key to remove the screw from the old QR body. Position the text indicating rider weight at the back of the QR, then reinsert the screw and tighten it securely.
Test and Go!
Once assembled, give everything a final check and make sure all parts are secure and functional. Test the QR in a controlled environment before heading out to the water. Safety is paramount, so take the time to ensure everything is working as it should.
By following these detailed steps, you can confidently replace the Quick Release on your North Kiteboarding Navigator Pro Control Bar and get back to enjoying your kiteboarding adventures with peace of mind.
Recent Posts
-

Code S Series vs. Code R Series Foils | Which One Is Right for You?
Welcome to Foil Fridays with Tucker! Today, Tucker introduces Code Foils, and-...Wait, MORE …1st May 2024 -

Big Air Kite Test - Harlem Force / North Orbit Pro / Duotone Evo D/Lab / Cabrinha Nitro v2
Today's big air kite review from Jason focuses on the Harlem Force, comparing it to the Nort …30th Apr 2024 -

Kitesurf Control Bar Review | North Navigator Pro / Duotone Trust / Core Sensor 3 Pro
Jason is an excellent reviewer of kiteboarding gear, limited only by what he's able to ge …29th Apr 2024