
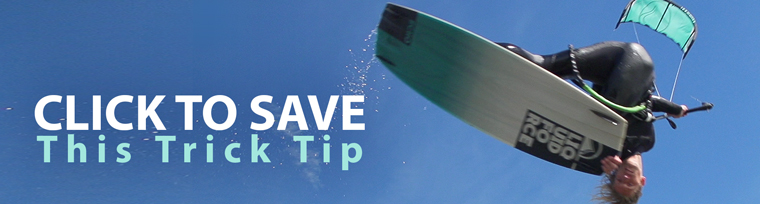
Kiteboarding How To: Jumping With Style - Ride With Blake Ep 01
How to Jump with Style
So you want to learn how to jump with style? You’ve come to the right place. In this video and blog, we’ll break down five practices to implement into your kiteboarding every session. Regardless of your level, adding these concepts to your riding will give you something fun to try and it might turn a few heads or two when you seemingly upgrade your style overnight.
For season three of Ride with Blake, we wanted to take things up a notch or two. Blake and I thought it would be a good idea to start producing themed playlists for kiteboarders who want to dive deeper into learning new kiteboarding tricks, have more fun on the water and spark some creativity on the water every session.
I’ve had the benefit of building Blake's videos for two years now and I’ve spent more time than most watching kiteboarding trick tips and paying attention to the details and bringing them back to my riding on the water. This new playlist is the culmination of us working together going deeper into often implied concepts and hopefully getting you to think a little differently about your kiteboarding on the water. Most importantly, have fun out there and keep it fresh!
We recommend you download the attached PDF on your phone. Check it before your next session!
This is the first video for our How to Jump with Style playlist so it will be a broad overview of 5 concepts that play a major role in all the videos in the list we’re building this season. Moving forward, expect a new kiteboarding trick every other week based around these concepts. Most will be somewhat easy to learn, others you might have to spend some time working into them. If you’re up for the challenge, we encourage you to spend your next kiteboarding season working though this playlist and master as many tricks as you like.
If you are completely new to kiteboarding and jumping, click this link here to open our beginner video on jumping in a new tab. Feel free to come back to this blog after you understand these concepts or just enjoy this for the entertainment if you're not already jumping.
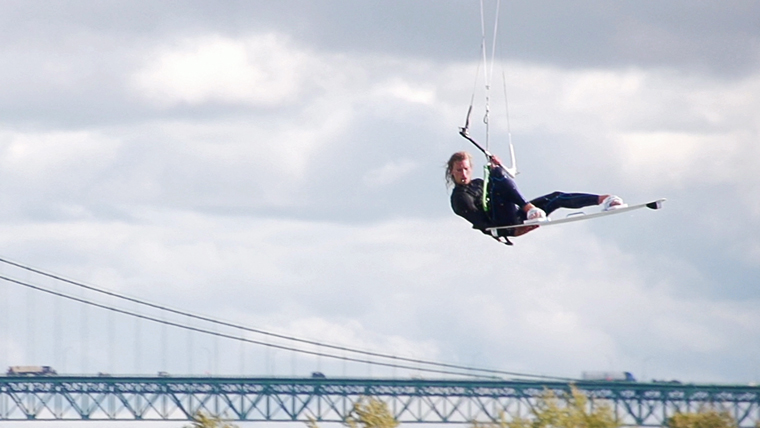
Keep the kite low
Concept One - Keep the Kite Low
In kiteboarding, you can do powered tricks with the kite low. Think wakestlye riders, or you can do sent lofty jumps with the kite at noon. Think air style riders. We recommend bringing the two together bringing a freestyle look to your riding.
Here’s how it works. Do a sent jump like you normally do. As soon as you pop off the water pull down with your front hand. The kite doesn't have to go super low. Just bring it down to 11 or 1 o’clock while you are in the air. This will add some power to your trick yet, it will still feel lofty. Often times, kiteboarders will keep the kite directly above them and only pull on their front hand right before a landing. Or worse they never dive the kite and when they land, they sink in the water because there is no kite power to keep them on a plane.
Not only that but it will make the trick look much more critical. What we mean is if you look at other board sports riders are often being pulled forward by something or falling forward due to gravity. If you keep the kite a bit lower after a jump you will not only be pulled up but forward. This is going to make anything you do look closer to snowboarding or wakeboarding.
It will slightly change your body position and make everything you do more photogenic. Not only does this look a little more stylish but It will make doing grabs easier later on. The extra momentum helps when bringing your knees up as your legs won’t just be dangling below you awkwardly. This is often the first step in building body awareness on the water.
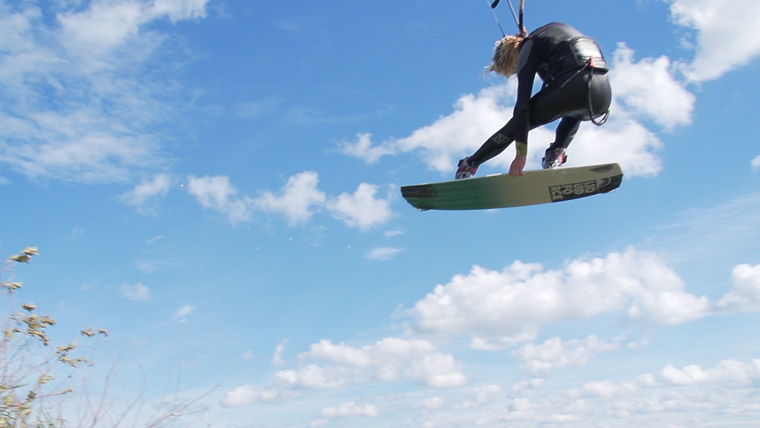
Tweak it out
Concept Two - Tweak it Out
This applies to anything. It doesn't have to be a grab, granted that will look the best. When riders first start jumping, they often lack body awareness in the air and a bit of control too.
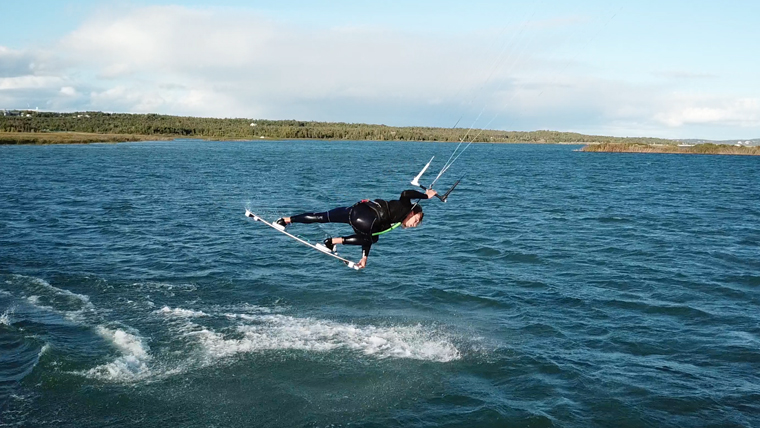
When we say tweak it out we mean bringing one knee to your chest and locking out the other leg.
This is not only going to look better but it will actually make everything easier too. If you’ve ever jumped and felt a lack of control in the air you know what I’m talking about. This is often because your legs are dangling below you and you might find your self oscillating or fighting to keep the kite from flying behind you.

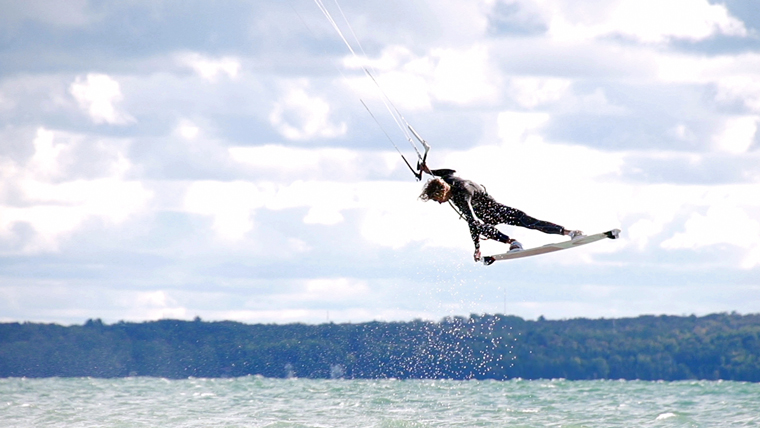
Classic example of dangle legs
When you bring your knees to your chest your keeping everything closer to your center of gravity. Locking one leg out will make certain grabs easier and just looks more stylish. When you pair this step with the first concept of keeping the kite a bit lower, You’ll automatically look more powered and in control of your riding.
An additional step here is to practice taking one hand off the bar in the air. Ideally your back hand. This will encourage you to keep the kite pulling forward and prepare you for grabs later on.
These two things together are going to help with the next two concepts as well
Off axis Rotations are easy to do and very stylish
Concept Three - Off Axis Rotations
This step is huge and much easier than it sounds. It’s also going to take your riding to the next level. Even if you are an experienced rider who happens to have a pretty good inverted back rolls. Thinking about different frames of axis is going to improve your body awareness, it makes grabs easier, it improves your style and it’s something you can do even in conditions you're not comfortable doing more critical tricks in.
If you are a newer or intermediate rider, this is going to help improve muscle memory and help you progress faster. What’s that famous Bruce lee quote? "I fear not the man who has practiced 10,000 kicks once, but I fear the man who has practiced one kick 10,000 times." Off axis rolls are easy and allow you to get the repetition you need without getting too worked trying to invert right away. Best of all, they often look more stylish than their more difficult counterparts when paired with a really tweaked out grab.
Repetition is the key to mastery
If you’re new to rolls, this is the place to start. Just send the kite, look over your front or back shoulder and swing your hips around. Your body is going to rotate wherever you are looking so make sure you keep looking over your shoulder. Tip number on is not just a recommendation for these but almost essential. The number one mistake kiteboarders make with their first rolls is pulling on their back hand and bringing the kite to the wrong side of the wind window. They promptly crash and wonder why their kite is crashing on the wrong side of the wind window.
So make sure, you keep pressure on your front hand whether its a frontroll or a backroll. Our tip about taking one hand off really helps here too. It might feel awkward at first but it will make these way easier.
Bonus tip: Get creative with this step
This is the step where things start getting fun. You can incorporate small 360° spins inches off the water and into your transitions.You can send the kite and use step one and two for a stylish roll. Start experimenting with your axis of rotation. From keeping your legs right under you to throwing them back a bit. Once you are aware of these different axis of rotation, you can deliberately incorporate them into whatever trick you are working on with a sense of control and awareness.
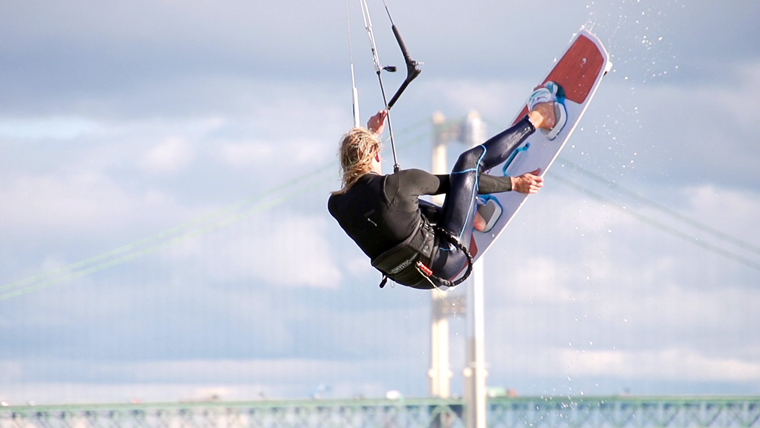
Nothing says control like a grab
Concept Four - Add Grabs
Experiment with your axis, what leg your tweaking and what grab you are going for. Some grabs are easier when you poke one leg and lock the other. Also shifting your axis of rotation is going to change how a grab looks pretty dramatically. A Roast beef grabs is pretty basic, Pair it with an off axis back roll and it becomes a whole new animal. The Mute grab is the most basic grab their is. Turn your back to your direction of travel and poking one leg out makes it look exciting and feel way more satisfying in the air.
The best way to start introducing grabs is to start with the most natural feeling ones and Idealy back hand grabs at first. We really wan’t you to get in the habit of keeping pressure on your front hand to keep the kite a little lower on your jumps. Don’t feel like you have to make the grab you are going for right away either. Sometimes it’s a matter of working your way up to it. I’ll include a basic grab char on the bottom of this page. Pick a couple and start practicing. Once you have a grab dialed, practice tweaking it more every time. The closer you can get one knee to your chest and the more locked out your opposite leg, the better looking the grab will be.
When you’ve really mastered tweaking it out. Start paring grabs with rolls. This is what you’ve been working towards. Nothing looks more stylish, hooked or unhooked than a solid roll paired with a really tweaked out grab. You can get really creative too like poking your leg out quickly or holding a grab on a certain axis before releasing. Two people doing the same trick can look completely different. What’s important is obtaining body awareness and being deliberate about your tricks. Overtime, you’ll start having a lot of fun just experimenting with small changes on the water. You could effectively turn one trick into three or more depending on how you incorporate these concepts!
Poke that back leg!
Concept Five - Land with Power.
The last thing to talk about here ties back into our first concept. Make sure when you land you keep kite around 11 or 1 o’clock. Don’t be afraid to give a little pull on your front hand before a landing. Just make sure you land flat with your weight centered over the board. Be sure to absorb the impact by bending your knees. Keeping the kite high will make the landing softer so if you have bad knees, it's’ not a bad idea. If you’re up to it however, it’s going to wrap up the trick nicely and will make even the most basic jumps look more energetic and powerful.
They key to landing with power is riding towards the kite, absorbing the landing by bending your knees on impact and only digging your edge in when you have full control. You can control how powered the landing is by how high you keep the kite. If your kite is at 11 or 1 O'clock a hard pull on the front hand diving it to 10 or 2 o'clock should be enough. The deeper and harder you dive the kite, the more powered the landing. You can also dive it harder after you land to soften the impact and keep speed on the water. This step is between you and your knees!

Even a basic grab and a small tweak add some style
The jump with style playlist
This video is the first in our new playlist on YouTube. We’ll be breaking down in detail, all the tricks showcased in this first episode so stay tuned. This playlist will be released bi weekly with the exception of next week's episode. We’re releasing a beginner video breaking down what one needs to become a kiteboarder. So stay tuned and we’ll continue this series the following week with our first trick.
Lastly, you might be thinking many of these ideas sound familiar and you’re not wrong. That doesn't make them any less valid. Mastery comes from consistent practice of basic concepts. These are the tenets of style in kiteboarding. Learn them, practice them, make them your own.
-Rygo
-Written and produced by Blake Olsen & Ryan (Rygo) Goloversic.
 Blake Olsen
A Michigan boy through and through (even though he was born in Saudi Arabia), Blake is a youth with a lifetime of experiences and adventures. Not only that, he's passionate about sharing his zest for life with others. He is proficient at many fields, including kiteboarding and acting as concierge to any who simply ask. Looking for an adventure? Well, Blake is your guy. From sailing the Gulf and the Caribbean to backpacking Hawaii and Southeast Asia, he knows his stuff and can make your vacation into an adventure.
Webpage: BlakeTheOlsen.com
Instagram: @BlakeTheOlsenFacebook: BlakeOlsen
 Ryan (Rygo) Goloversic
Just a dude from a kite shop testing all the gear one session at a time.
Many people dream of quitting their job, traveling the world and pursuing their passions. Rygo is one of those people who pulled the trigger. About eight years into a postal career, he decided to change everything and travel as a freelance videographer & writer. This took him from coast to coast and a variety of countries. Nowadays you can catch him on the phones, doing lessons, or working on videos. Of course, he still makes a point to travel as often as possible. His mission is to help people and share the stoke with his customers and students alike. Get out there and kiteboard.
Producer of: Ride with Blake I Sessions I Versus I Destinations I Foil Friday
Recent Posts
-

Kiteboarding | Crafting the Harlem Force Kite with Sustainability and Performance
Unparalleled Performance Meets Unmatched Sustainability The kiteboarding industry is on …24th Apr 2024 -

Duotone Ventis 2025 | What's New?
If you're familiar with Duotone's Ventis, you know its specialty is freeriding in light wind …23rd Apr 2024 -

Duotone Ventis D/LAB 2025 Overview
If you ride in an area with multiple light wind days and need a wing that'll let you get o …23rd Apr 2024