
RIIFT Power Pack Setup | Step-by-Step Foil Assist Rigging Guide
Foil assist has quickly become one of the most talked-about upgrades in the foiling world, and RIIFT is a new kid on the block that is making riders stop and take notice. They’ve come correct with a system that is unique, highly functional and super easy to setup and use, even if it’s your first time using a foil assist system.
Setting up a RIIFT power pack on a RIIFT-enabled board is quick. From unboxing the propulsion unit to pairing the remote, the whole process takes about five minutes once you know the steps. This guide walks through each stage, explains why each step matters, and shares the small details that make the difference between a setup that feels "okay" and one that feels dialed.
What You Need Before You Start
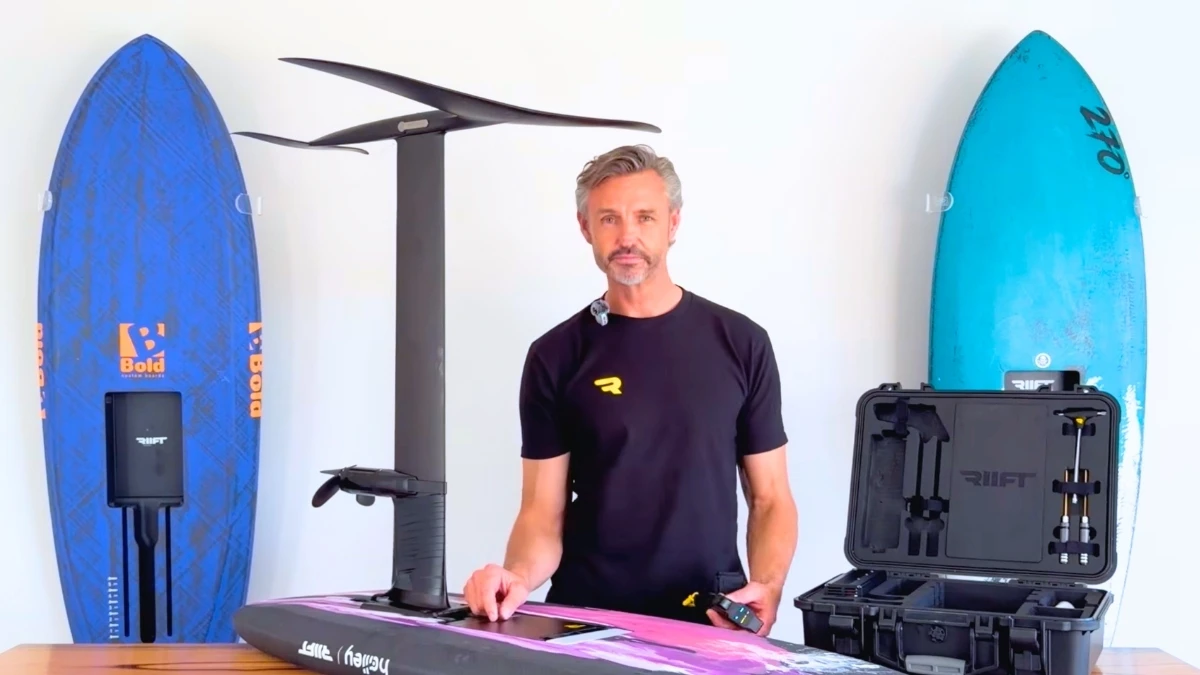
Before you start rigging, lay out everything on a clean, sand-free surface. Having the full kit in front of you keeps the process smooth and helps you avoid getting grit into the electrical contacts.
- RIIFT propulsion unit | The rotor (with propeller blades and hub) and the stator on the motor mount
- Universal mount and strap | Attaches the propulsion unit to your mast
- RIIFT power module | The battery unit that drops into the board (this guide uses the 3P power module)
- RIIFT-enabled foil board | A board built with the track system to accept the power module
- Your mast and foil | Ideally a setup you already know well, so the only new variable is the motor
- Cassette dummy | Needed if your 3P module is going into a large track board
- Battery grease | For the power module plug contacts on first use
- Tape | To secure the motor cable along the mast
- RIIFT remote | Charged and ready to pair
Starting with a mast and foil you are already comfortable on is a smart move. It isolates the foil assist as the only new element, which makes it much easier to judge how the system feels on the water.
Step 1 | Mount the Propulsion Unit on the Mast
The propulsion unit is the heart of the system, and getting it mounted cleanly sets the tone for everything that follows.
Understanding the Two-Piece Motor
The RIIFT propulsion unit ships in two pieces:
- The rotor | Includes the propeller blades and the hub
- The stator | Sits on the motor mount
Together, the rotor and stator form the complete motor. Knowing which part is which helps you handle each component properly during setup and maintenance.
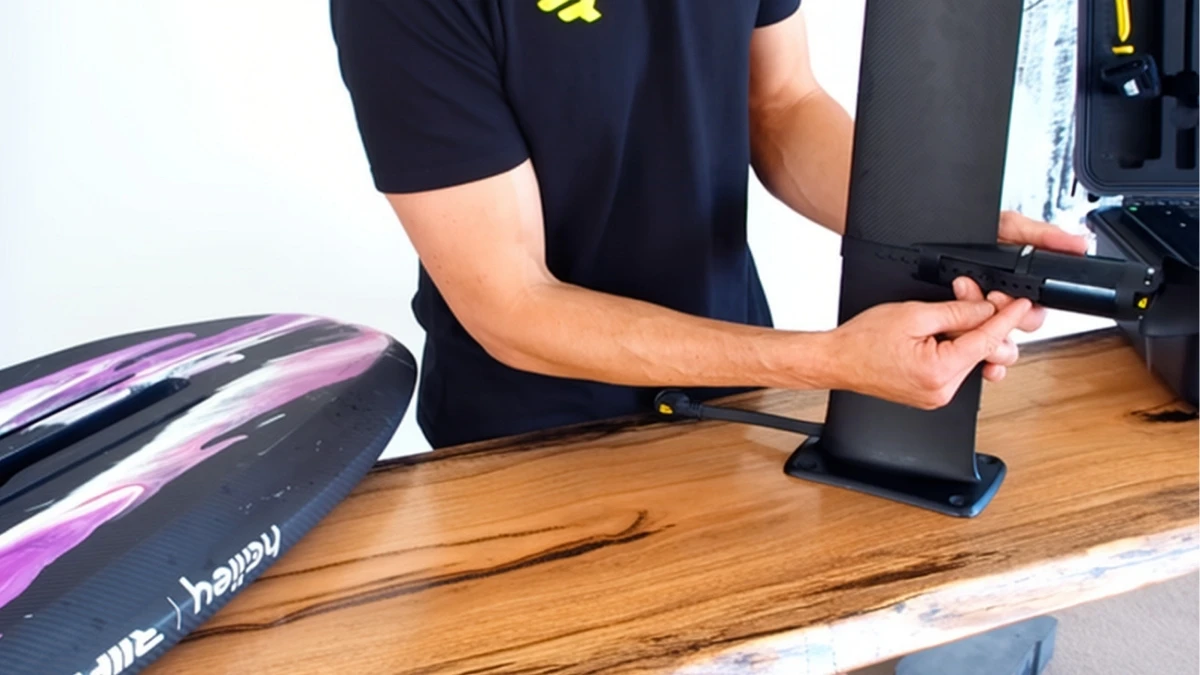
Sliding on the Universal Mount
The universal mount slides directly onto the trailing edge of your mast. Give it a nice, firm push so it seats securely against the mast profile.
Choosing Your Motor Height
How high should you mount the motor on the mast? It comes down to personal preference, and there is no single correct answer.
A useful rule of thumb for foil assist:
- Measure roughly one hand span from the tip of the lowest propeller blade to the bottom of your board
- Treat this as a starting point, not a fixed rule
- Adjust over time based on how you like the system to feel
Analytical riders will appreciate that this is a variable worth testing. Start at the hand span reference, log a few sessions, and fine-tune from there.
Securing the Strap
Once the mount is in position:
- Pass the strap through the guide
- Pull it moderately firm onto the cleats
- Check that the mount is snug with no wobble
If you have surplus strap left over, trim it down so roughly three or four holes remain. That leaves enough length to tuck the tail away neatly for a clean line along the mast. Less loose material means less drag and less to snag.
Taping the Motor Cable
With the propulsion unit secured, tape the motor cable flat along the mast. A tidy cable run keeps things clean in the water and protects the cable during rigging and riding.
Step 2 | Mount the Base Plate to the Board
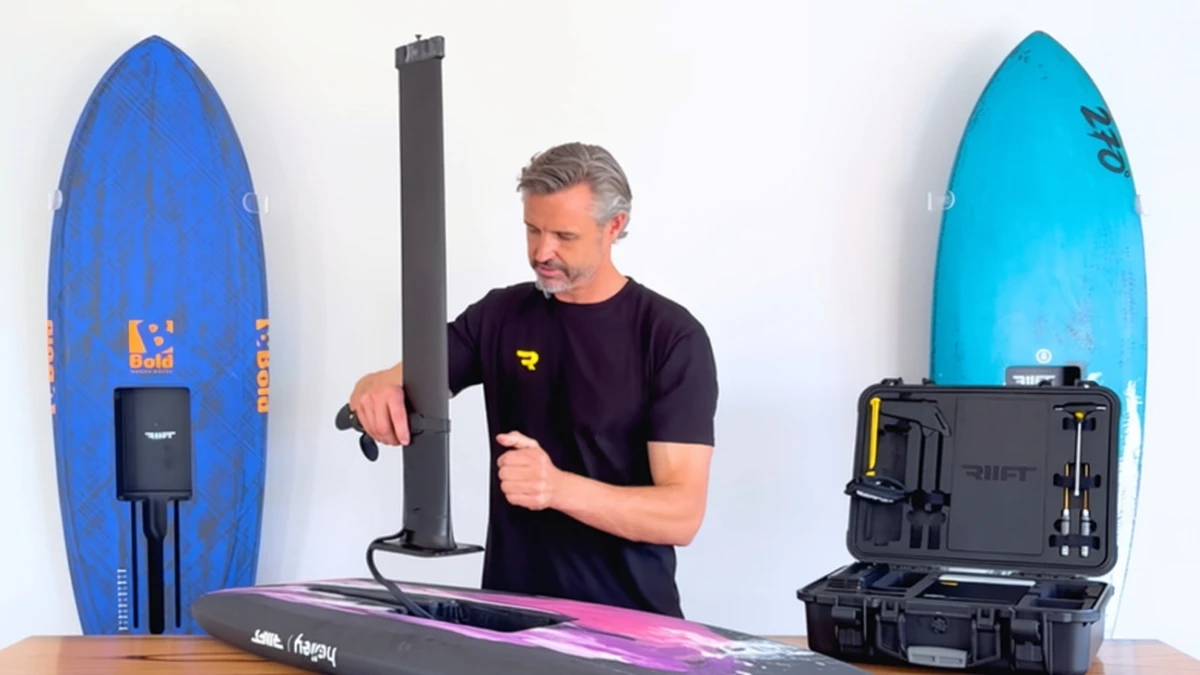
This step will feel very familiar to anyone who has mounted a mast on a foil board before. The process is essentially the same as a standard mast install, with one important difference.
- Route the motor cable carefully | Make sure the motor cable runs neatly inside the board's cable channel as you mount the base plate
- Avoid pinching the cable | A trapped or kinked cable is an easy mistake to make and an annoying one to fix later
- Leave the base plate bolts slightly loose | This lets you slide the mast fore and aft when you fine-tune positioning in Step 4
Leaving the bolts loose at this stage is one of those small habits that saves time. There is no point cranking everything down only to loosen it again a few minutes later.
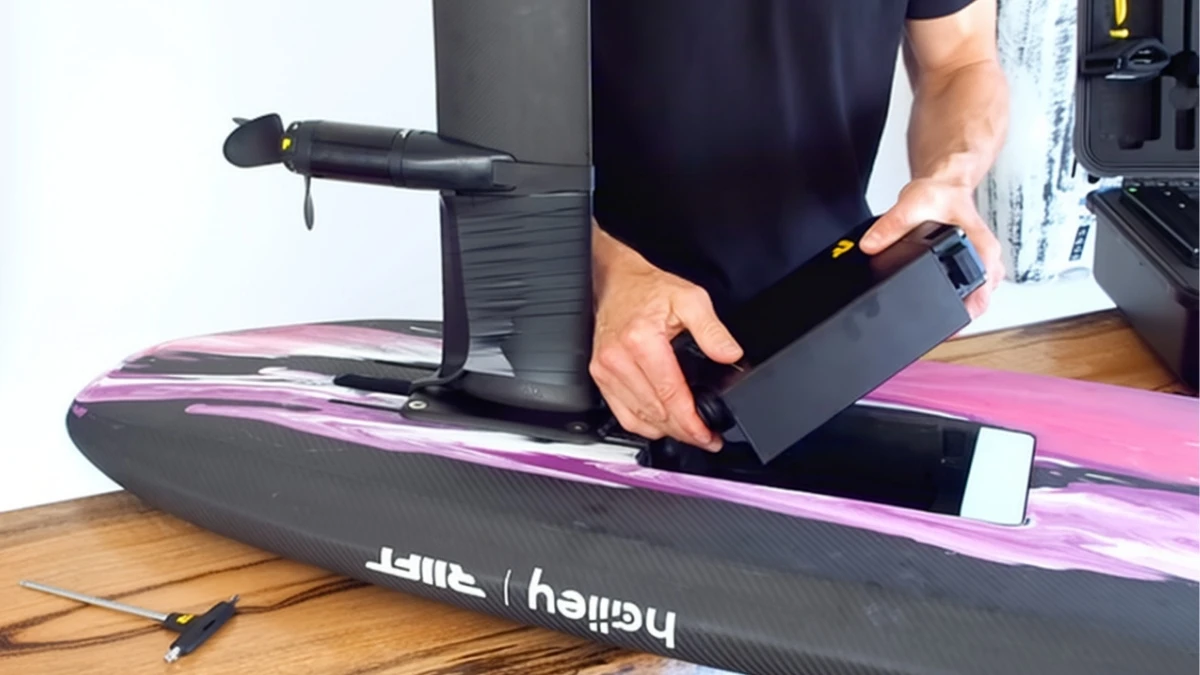
Step 3 | Install the Power Module
Now it is time to bring the power. This step covers the battery prep, the plug connection, and seating the module properly in the board.
Using the Cassette Dummy on Large Track Boards
If you are running the 3P power module in a large track board, you will also need the cassette dummy. The dummy fills the empty space at the front of the track so the deck surface stays flush. A flush surface matters for comfort under your feet and for a clean, finished setup.
Applying Battery Grease on First Use
The first time you use a new power module, prep the plug:
- Take a small amount of battery grease
- Apply it to the contact points of the power module plug
- Keep it light; a little goes a long way
It's a quick first-use step that takes seconds and sets the module up for a clean connection.
Connecting and Seating the Power Module
With the plug prepped:
- Push the motor cable firmly into the power module plug
- Line up the module's locating pins with their slots in the board
- Drop the power module into place
- Press it down by hand to make sure it is fully seated
That last step is easy to skip, but it is worth doing every time, especially if there is any sand or debris around the track. Manually seating the module confirms it is locked in and sitting where it should be.
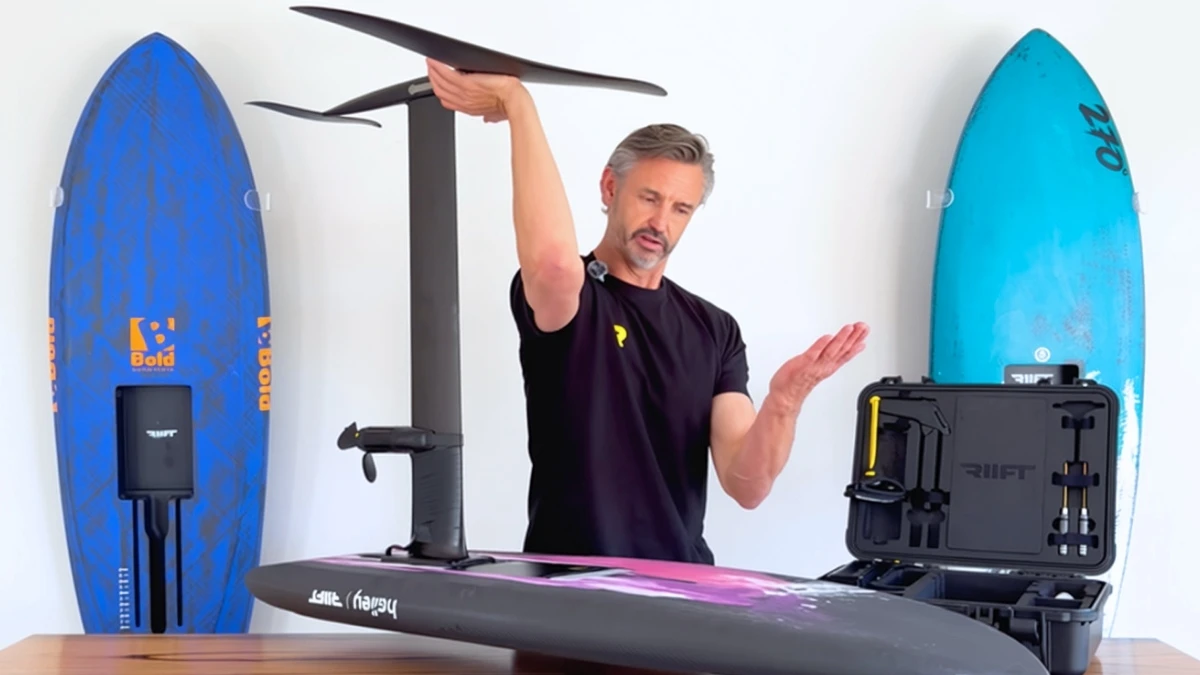
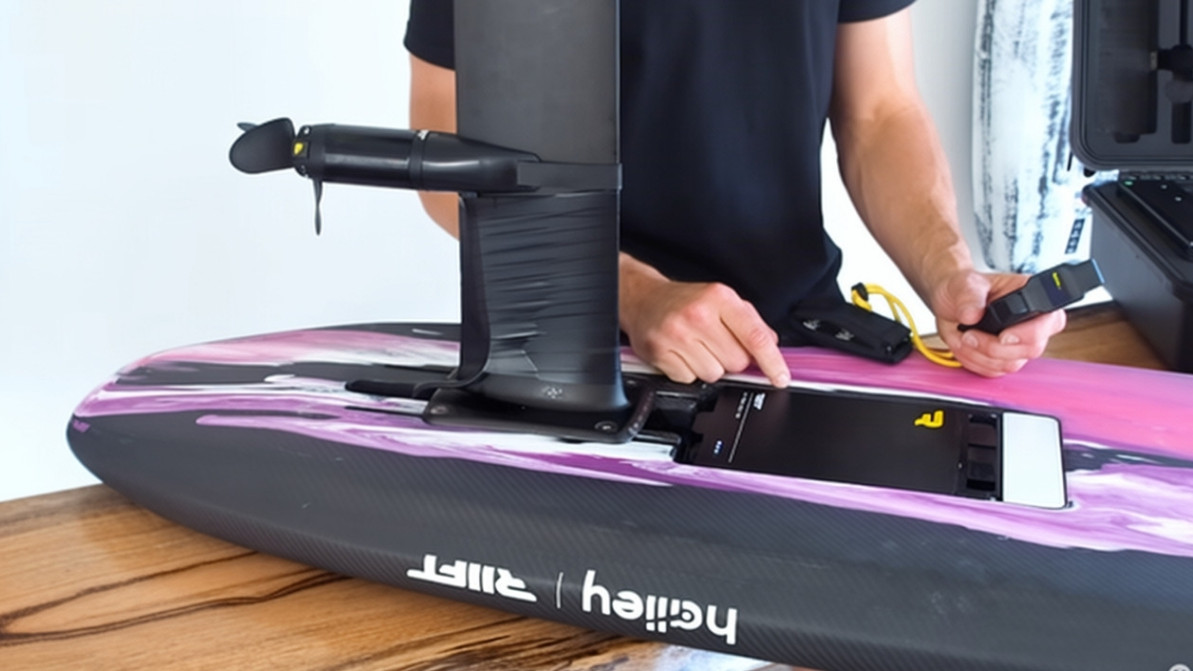
Step 4 | Dial In Your Base Plate Position
This is the step that separates a good RIIFT setup from a great one. Board positioning has a direct impact on how natural the system feels on the water.
Why Center of Mass Matters
A big part of why RIIFT feels so good to ride comes down to weight placement. The design intent is for the center of mass of the power module to sit directly over the front wing's center of lift. When those two line up, the added weight of the battery feels balanced instead of nose-heavy or tail-heavy.
The Front Wing Lift Test
To find that sweet spot, attach the front wing and use this simple test:
- Lift the entire setup by the front wing
- Watch how the board reacts
- Adjust the base plate position until the board hangs level
Here is how to read the results:
- Nose lifts up | The base plate is too far forward
- Nose drops down | The base plate is too far back
- Board lifts nice and flat | You have found a solid starting position
Once the board hangs flat when lifted from the front wing, tighten the base plate bolts. This position is a strong baseline, and you can refine it on the water if your riding style calls for it.
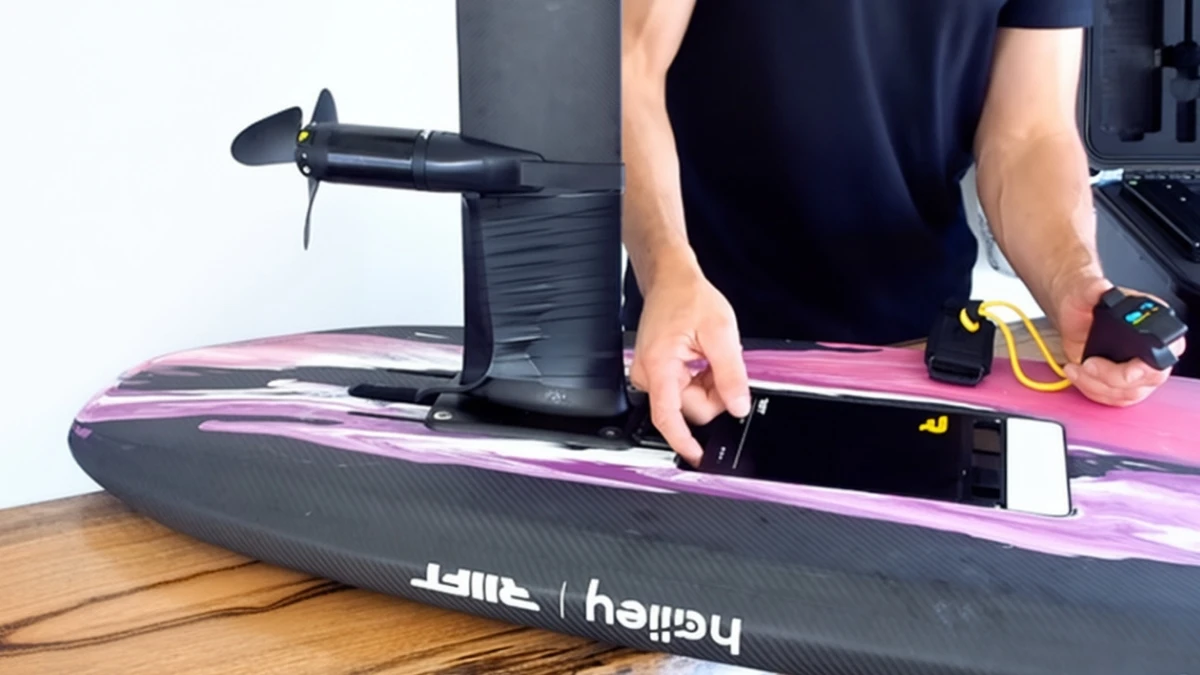
Step 5 | Pair the RIIFT Remote
The final step is connecting the remote to the power module. You only need to do this the first time you use a specific remote with a specific power module.
First-Time Pairing
- Turn on the remote
- Enter the menu
- Select Pair, the first item in the menu
- The remote will begin searching for a battery
- Turn on the power module
As soon as the power module powers up, the two devices pair. Check that the prop area is clear, and you are ready to ride.
Already Paired?
Once a remote and power module have been paired, you do not need to repeat the process. Simply turn the power module on, and it will connect to the remote automatically.

Safety | Power Down Before You Walk to the Water
Here is a habit worth building from day one: never carry your board with a live prop.
- Switch the power module off after pairing or testing
- Walk your gear down to the water with no power to the propeller
- Power the system back on only once you are in the water and ready to go
An accidental throttle bump while carrying a board across a crowded beach or launch is completely avoidable. Since the remote stays paired, powering back on at the water's edge takes seconds.

RIIFT Setup Tips for a Faster Rig
A few habits from the setup process that are worth repeating every session:
- Rig on a clean surface | Sand and debris are the enemy of electrical contacts and track systems
- Use a familiar mast and foil | Keep the foil assist as the only new variable while you learn the system
- Start at a hand span of motor height | Then adjust based on feel
- Leave base plate bolts loose until Step 4 | Position first, tighten second
- Always do the front wing lift test | It is the fastest way to get balanced weight placement
- Hand-seat the power module every time | A few seconds of checking beats a loose module on the water
- Carry with the power off | Every session, no exceptions
Key Takeaways
- Setting up a RIIFT power pack on a RIIFT-enabled board takes about five minutes once you know the steps
- The propulsion unit comes in two pieces: a rotor with propeller blades and hub, and a stator on the motor mount
- The universal mount slides onto the trailing edge of your mast and secures with a strap through a guide and onto cleats
- A good starting point for motor height is about one hand span from the lowest blade tip to the bottom of the board
- Trim surplus strap to three or four holes so it tucks away cleanly
- Leave base plate bolts loose until you finish positioning
- Apply battery grease to the power module plug contacts on first use
- Use the cassette dummy when running a 3P power module in a large track board
- Position the base plate so the power module's center of mass sits over the front wing's center of lift
- The front wing lift test tells you if you are too far forward (nose up) or too far back (nose down)
- Remote pairing is a one-time step for each remote and power module combination
- Always switch the power module off before carrying your gear to the water
Frequently Asked Questions
How long does it take to set up a RIIFT power pack?
Once you are familiar with the process, setting up a RIIFT power pack on a RIIFT-enabled board takes about five minutes. That includes mounting the propulsion unit, installing the base plate and power module, positioning the board, and pairing the remote.
How high should I mount the RIIFT motor on my mast?
Motor height is personal preference. A helpful rule of thumb is to place the motor so there is about one hand span between the tip of the lowest propeller blade and the bottom of your board. Use that as a baseline and adjust to suit your riding.
How does the RIIFT propulsion unit attach to the mast?
The propulsion unit uses a universal mount that slides onto the trailing edge of the mast. You push it firmly into place, pass the strap through the guide, and pull it moderately firm onto the cleats. The motor cable is then taped along the mast.
Do I need to use battery grease on the RIIFT power module?
Yes, the first time you use a power module, apply a small amount of battery grease to the contact points of the power module plug before connecting the motor cable.
What is the RIIFT cassette dummy for?
The cassette dummy fills the empty space at the front of a large track board when you are running a 3P power module. It keeps the deck surface flush.
Where should I position the base plate on a RIIFT board?
Position the base plate so the power module's center of mass sits directly over the front wing's center of lift. To check, lift the setup by the front wing. If the nose lifts, the base plate is too far forward. If the nose drops, it is too far back. When the board lifts flat, you have a good starting point.
Why does RIIFT feel natural to ride?
A big reason is weight placement. With the power module's center of mass positioned directly over the front wing, the added battery weight feels balanced rather than pulling the nose up or down.
Do I need to pair the RIIFT remote every time I ride?
No. Pairing is only required the first time you use a specific remote with a specific power module. After that, turning on the power module connects it to the remote automatically.
How do I pair the RIIFT remote?
Turn on the remote, enter the menu, and select Pair, which is the first menu item. The remote will search for a battery. Turn on the power module, and the two will pair.
Should I carry my RIIFT board to the water with the power on?
No. For safety, switch the power module off before carrying your board and gear to the water. Power it back on once you are in the water and ready to ride.
Let's Talk Foil Assist
Whether you are dialing in your first RIIFT setup or weighing foil assist against your current quiver, the MACkite crew has been helping riders dial in their wind and water gear since 1999. Our team spends plenty of time on the water, from the Great Lakes to the coasts, and we are always happy to talk shop.
Have a question about RIIFT compatibility, motor height, board choice, or how foil assist fits into your wing foiling or parawinging program?
Drop us a line at Kiteboarder@MACkite.com. No pressure, just honest gear talk from people who live this stuff.
Recent Posts
-
RIIFT Power Pack Setup | Step-by-Step Foil Assist Rigging Guide
Foil assist has quickly become one of the most talked-about upgrades in the foiling world, and RI …2nd Nov 2026 -

Slingshot NXT V2 Review: Loftier & Faster Big Air Performance
The Brazilian Brothers are back to provide a full-length review of the Slingshot NXT V2. See how t …30th Oct 2026 -

Foil Drive Progression: 3 Common Beginner Mistakes
Ryan and Hunter are sharing the top three mistakes beginners make with their Foil Drive system to …29th Oct 2026