

Ride with Blake | How to Toe-Side Transition
Hey Guys, Blake here!
This week, were going to cover one of the first tricks you can learn in kiteboarding and one that you can use to add style to your transitions. The Toeside Transition with a pop to toeside, a smooth carve and a downloop.
The aim of this progression is to add some serious style and energy to your transitions so pay attention, print of the written steps found at the bottom of this blog and practice!

When to Start Riding Toeside
Once you're riding upwind, feeling comfortable on your heelside edge and looking for the next step in progression, riding toeside is the trick you want to learn. It has a really nice feel because it opens up your shoulders to the direction you are riding, allows you to free your front hand and cruise with a nice ocean view ahead of you. It is also a really good way to ride downwind and give your legs a break if you are on a downwinder. Once you learn to ride upwind it becomes such a natural feeling that riding downwind is actually quite difficult. Riding toeside can help you with this. When switching to your toeside edge you can either slide or pop around, so going into making a transition it’s important to understand what you are about to do, grasp the concept and be able to visualize yourself doing it.
So, Here Is How You Ride Toeside
The first and easiest step to start riding toeside is to practice on the beach with either a trainer kite or your regular kite. You usually have a preferred side in which to ride toeside so it’s good to figure that out on the beach. Whatever way feels more natural practice walking with your hips and shoulders turned away from the kite flying it with one hand. It’s important to be confident in flying your kite with one hand and without looking because that is what allows you to open up and edge against the kite.
Do this for about ten minutes or until you feel comfortable and then walk or ride upwind before you start to give yourself room for error. When you are learning to ride toeside it’s tricky to start riding upwind right away. In your first session really try and fly the kite with one hand as much as possible and sign the kite without looking at it. Once you feel confident it’s time to practice making the transition from heelside to toeside.
Five Steps That Will Help You When Riding Toeside:
- Bring your kite to 11 or 1 o’clock
- Keep your weight balanced over the board
- Transfer your weight to the heel of your foot and carve into the wind
- Release your heelside edge, swing your hips and transfer your weight onto your toes.
- Keep your weight over your new back foot and pull in on the bar for extra power.
If you can visualize yourself doing these 5 simple steps first then the rest of what I am going to tell you will make more sense.
As you go into riding toeside you really want to make sure that you keep your weight behind the board. As you swing your hips and transfer your weight it’s easy for the kite to pull you over your toeside edge. Think of it as there’s an invisible line running through the middle of your board and you don’t want your shoulders to cross over that line. While transferring your weight pull in on your front knee and push out with your back foot, keeping weight on your heels. It is similar to making a regular transition but instead of sending your kite you can simply keep it parked and carry on the same direction.
Once you make the switch to toeside you need to consciously keep your weight over the backside of the board, even though it make seem unnatural. Twist your shoulders so that you are facing the nose of the board and lean against the kite so that it pulls you forward. On your first session practice riding downwind towards the kite and getting comfortable riding toeside with a slight edge to your board. Don’t worry about going upwind just yet unless it feels natural for you. It’s all about building up your muscle memory and taking it step by step. The more you practice the simple steps the better it will make you towards reaching the ultimate goal.
Common Mistakes to Think About and Correct:
- Not having enough speed and sinking into the water
- Catching your toeside edge as you swing your hips and transfer weight to your toes
- Making the rotation to toeside and then losing power
- Getting downwinded and not being able to fly the kite with one hand
Now that you have that skill it’s time to push it to the next level and start riding toeside upwind!
If you can visualize yourself doing these 5 simple steps first then the rest of what I am going to tell you will make more sense.
Pull in on front leg and push out on back leg swinging your hips. As you do this, get low, keep your shoulders over your knees, and transfer weight from your heels to your toes. Once you have made the transition pull in on the bar and sign the kite for extra speed. Ride slightly downwind to gain speed and then slowly start your edge upwind while simultaneously sheeting out on the bar. Your shoulders and hips should be twisted to face the front of the board and you should open up with your front hand. Putting your arm out helps you completely open up and start riding upwind. If you have a reference point to look at or point with your arm it will help you stay on track.
The key to not losing power while riding toeside is to not put too much weight your back foot. It’s can be awkward when you start riding like this and your weight distribution gets messed up. Be conscious that if you put too much weight on the back of your board it’s like you are pushing on the breaks. By applying a bit more front foot pressure it will allow you to keep the board on plane and not fight against the kite. Think of it as a boat going on plane. If everyone is sitting in the back of the boat it takes a while before the engine has enough power to get the boat moving. If you move some of the people forward then it evens out the weight distribution and allows for the engine to not work so hard and get moving right away. This same concept goes for riding a kiteboard and while we do weight the back foot more than the front there is a limit to how much before it becomes counter intuitive.
It’s good to be sufficiently powered when learning to ride toeside. It does take a bit more power to keep you going and to be able to stay upwind. When you are flying the kite with your one hand be sure to have a good amount of control so that you can stay opened up and not have to keep putting your front hand back on the bar. I like to put my hand in the center of the bar with my fingers spread wide and my thumb on the other side of the bar. This gives you extra leverage on the bar and enables you to aggressively steer the kite if need be.
Whenever you feel yourself slowly sinking in the water, get compact by bringing your knees to your chest, flatten your board, keep your body weight over it and quickly powerstroke the kite. Once you are moving it’s important to start edging against the kite to maintain your speed with the kite. If you ride towards the kite you will lose power, whereas when you edge against it you're creating momentum by moving parallel to the wind.
Well that’s it for this week, hope this has helped you ride toeside and progress one step further into the world of kiteboarding. We look forward to bringing you more trick tips throughout this year and progressing with you as we build this series. As a teacher I know that one of the best ways of learning is by constructive criticism and positive feedback, so if any of you have any suggestions for us at MACKite we welcome your insight and look forward to bringing you the best videos we can. If you enjoy these, give us a thumbs up and subscribe to see more of our weekly videos.

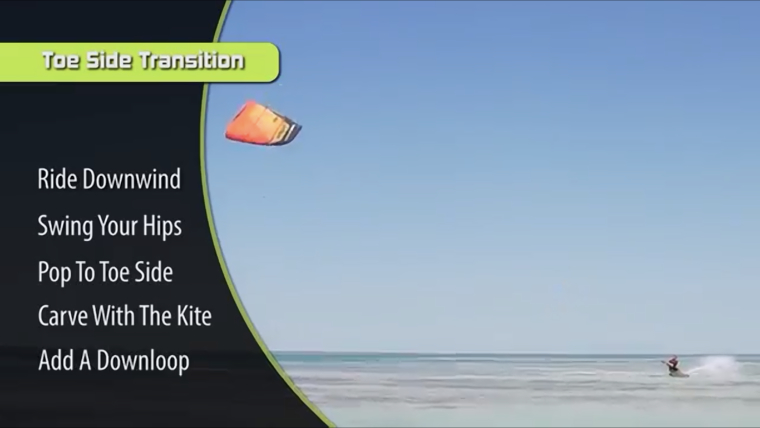
Printable Steps For the Beach
Step 1: Ride Downwind
Learn to ride downwind. Keep the kite high around 11 or 1 with your hands in the middle of the bar. Pull in with your front foot and push out with your back foot. Shift your weight from one edge to the other and start riding downwind with your weigh over your new back knee and your toe side edge digging into the water. At first, it's okay to keep both hands on the middle of the control bar since you are just riding downwind and building up the muscle memory to ride downwind.
Step 2: Swing Your Hips
Now that you're riding downwind, with your board flat, you can swing your hips around and bring your trailing foot to the front. Don't try to edge against the kite at first—just follow the kite until you get used to the feeling. Then, lean into your toeside edge when you're ready.
Step 3: Pop-to-Toeside
For those that already have a few board skills in hand, try the Pop to Toeside. Just do a quick ollie, like on a skateboard, and pop a little 180 to switch your stance.
Step 4: Carve with the Kite
You may simply fly your kite in the opposite direction and follow it like normal, but with a toeside carve.
Step 5: Add a Downloop
Or, if you like being more powered, do a down-loop with your kite and follow it through the toeside turn.
Let’s just start with these two grabs for this week, get them dialed in and then next week we can move on to a few more advanced grabs.
 Blake Olsen
A Michigan boy through and through (even though he was born in Saudi Arabia), Blake is a youth with a lifetime of experiences and adventures. Not only that, he's passionate about sharing his zest for life with others. He is proficient at many fields, including kiteboarding and acting as concierge to any who simply ask. Looking for an adventure? Well, Blake is your guy. From sailing the Gulf and the Caribbean to backpacking Hawaii and Southeast Asia, he knows his stuff and can make your vacation into an adventure.
Webpage:
BlakeTheOlsen.com
Instagram:
@BlakeTheOlsen
Facebook: BlakeOlsen
Recent Posts
-

Foil Drive | Essential Tips to Supercharge Your First Session
The Foil Drive makes your foiling life easier. You'll get up easier and catch more waves, …17th Apr 2024 -

2024 Duotone Slick Wing Review | What's New in This Year's Model?
The Duotone Slick has been a favorite of many for several years. Pros love it for its speed, …15th Apr 2024 -

Lightwind Kiteboarding in Key West with Kristen and RyGo | MACkite x Airush
Kristen and Rygo are headed down to Key West in the RV, where they'll hook up with the cr …15th Apr 2024