

What You Need to Be a Kiteboarder - Ride With Blake Special Edit
Heads up, this is a special edition. If you've been following our bi-weekly "How to Jump with Style" videos, stay tuned. We’ll be back on our regular schedule with these next week.
So you want to become a kiteboarder? Maybe you’ve seen it on your local beach and now you’re curious what it takes to get into an adventure sport like this. This video and extensive blog should break down the steps you need to take, and breaks down in detail many questions you might have. We’ll also include a number of videos that break down gear in detail and some other kiteboarding-related topics!
If you have any questions you can always reach out to us via our live chat or give us a call at 800 622 4655
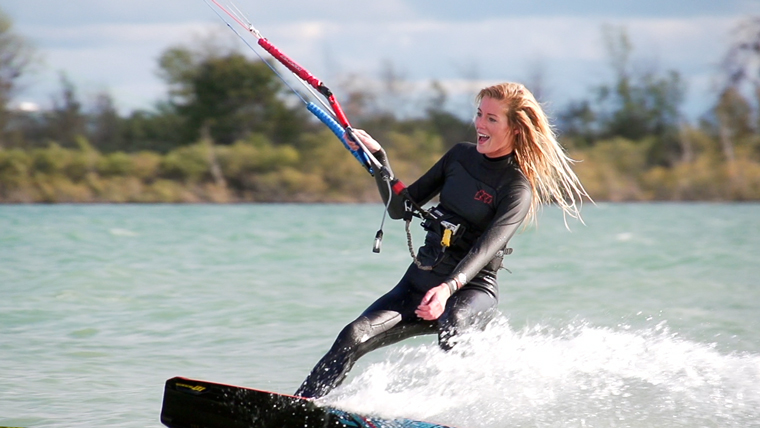
Kiteboarding lessons are fun
Step one - Take a Lesson
Visit your local kiteboarding shop or give us a shout if you don’t live anywhere near one. Most shps will offer kiteboarding lessons this is step one.
Before you take a lesson, you could also pick a small trainer kite. This is a useful tool that will teach you the basics of power kiting. Students who use one of these even a few hours before taking their lesson often progress twice as fast during the lesson. This step is optional of course. Trainer kites range from $70 to upwards of $400 depending on a number of factors. If you just want something for a little practice before a lesson a simple trainer is perfect. If you want something to use in the water or on the snow you’ll want something high end.
Taking a lesson
Some sports you can get away with teaching yourself. Kiteboarding is not one of those sports. You’ll save yourself weeks if not months of pain. Not only that but you’ll keep yourself safe and the local beach open. Lessons are also a great introduction into the kiteboarding community! Make sure you swap numbers with your fellow students and get to know some of the loals after the lesson. You’ll learn a great deal about our culture and some of the signals we give each other on the beach.
Not only that but professional kiteboarding schools focus on safety. You’ll gain a wealth of safety and emergency knowledge that will make or break your kiteboarding journey. Kiteboarding has become incredibly safe the last decade. There was a time when this was a bit of an extreme sport. While the equipment has become safe, it’s still like driving a car and you need to know what you are doing before pumping up on the local beach.
Everyone learns at a different pace so some people will be competent and ready to go after 8 hours of instruction. Others, if not most require a follow up lesson or two. It just depends on your comfort level and what you would like to learn. Many schools offer advanced or private lessons after the introduction course. Don’t hesitate to take advantage of this is you need it. You’ll be able to decide what's right for you after your first lesson and speaking with your instructor.
After your kiteboarding lesson you'll need equipment
Step two - Getting gear
After your lesson, you’ll need to get some equipment. This can be overwhelming as there is a lot of different types of kiteboarding kites out there and so many other pieces of equipment. The good news is that kiteboarding gear has come a long way and most gear is pretty well rounded for riders of all levels. We’ll break down everything you need and give you some insights into the equipment.
For a beginner, the easiest thing to do is pick up a package deal. Packages will bundle everything you need to get on the water and progress. Most packages will come with a kite that is not only easy to learn on but also a kite you can progress to the highest level of kiteboarding.
These are known as all around kites. While there are nitch kites for specific styles of riding as a beginner, you’ll want to avoid these kites. A couple years into your riding, you’ll have developed your skills and maybe even honed in on a specific discipline like wave riding. Then, you might want to consider something more nitch or you might just want to stick with an upgraded version of the kite you learned on. In modern times, all around kites are in fact that good
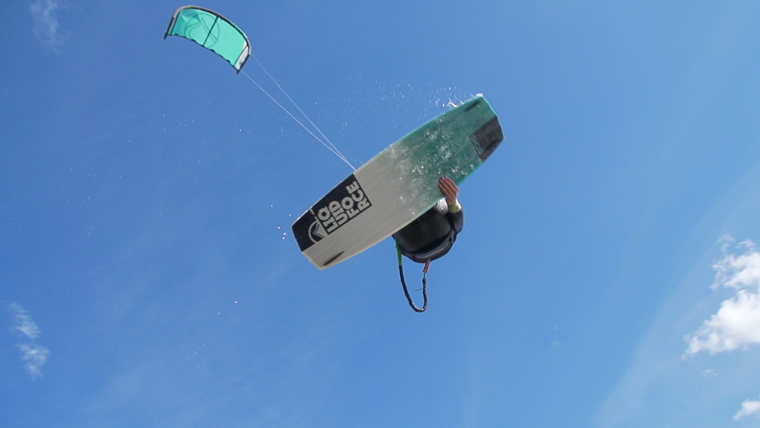
This year Blake is getting back on the kites he learned on years ago. We’ll include a link to this package if you want to check it out.
This is the kite Blake learned on and the kite he is choosing to use for in 2019.
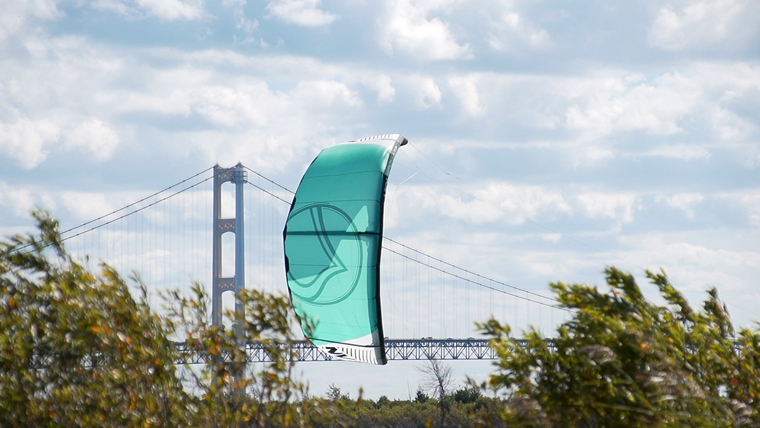
The Liquid Force NV is a perfect example of an all around kite
The Kite
First you’re going to need a kite. There are a lot of options but we recommend learning on an inflatable all around freeride kite. Next, you’ll need to get the right size for your weight and the location you will be learning in.
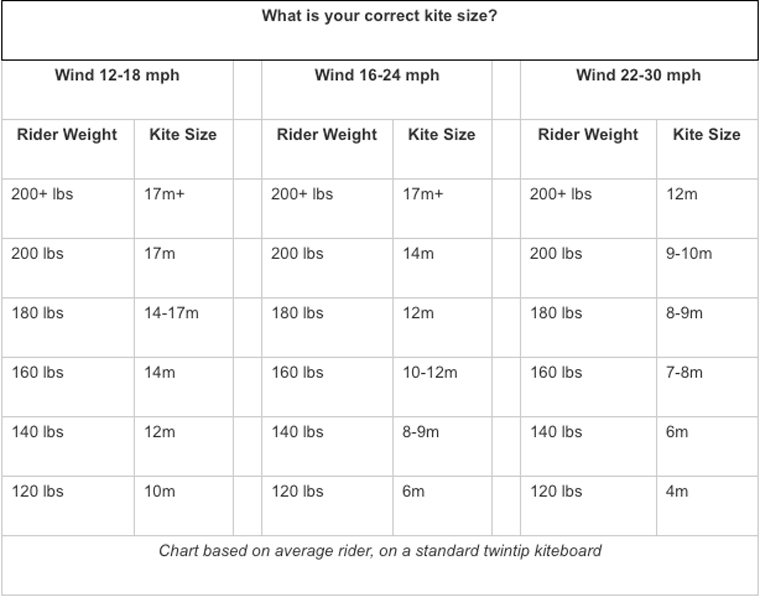
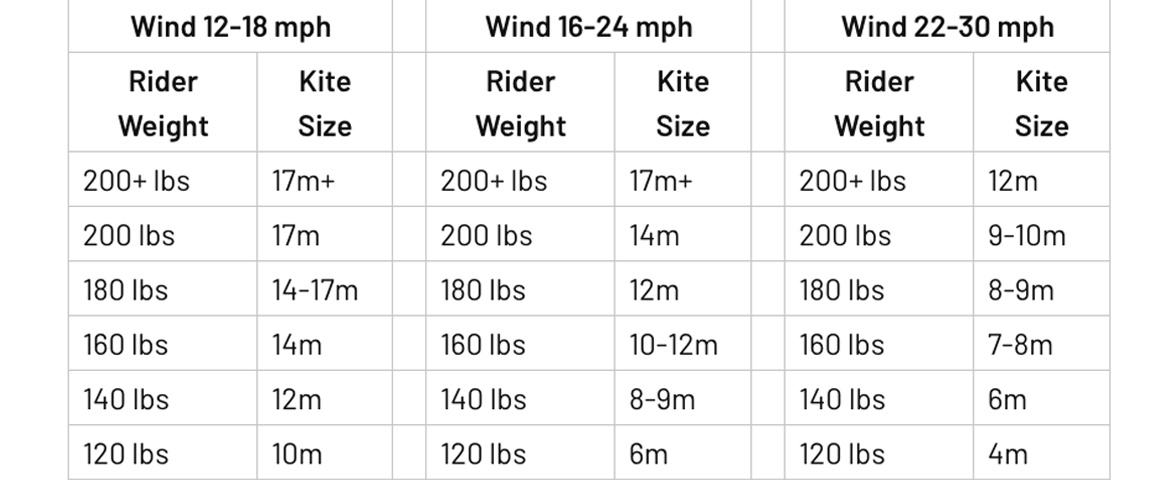
Eventually, you’ll want a quiver of kites. One for high wind, one for light wind and one for average winds. Right now, you’re going to pick one. It’s best to learn on your midrange kite. Small kites for high wind are fast and can be difficult to learn on. Large kites can be quite slow and powerful. The midrange kite will be the size you would spend the most time on depending on your weight. For a heavy rider, this might be as large as a 14 meter.
For someone who is petite, a seven meter might be the right size. It’s always a good idea to chat with an expert. Be that your instructor, your local shop or give us a call and we’ll guide you through it. For some reference I’m going to include a kiteboarding size chart. This isn’t exact as every kite is different but this should give you some perspective.
You need a control bar to steer the kite
The Control Bar
You’re going to need a bar and lines to control the kite. This is what connects to kite to the rider and allows you to steer the kite. Blake recommends sticking with one brand and that’s not a bad idea. You can however mix some brands if you desire. Just be careful as not all brands are compatible with out modification. Hence its easiest to stick within a brand.
There are 4 line bars, 5 lines bars and even 6 line bars. 4 lines is the standard for most kites and 5 lines comes in at a close second. 6 is quite rare and something you should avoid as a beginner. This is where you will find your safety system as well. It will allow the rider to take the power out of the kite or eject it completely if necessary.
Recently control bars come in two varieties. A Fixed length and adjustable.
Fixed bars
While not imperative kites are often paired with a certain size. 10 meter kites and under are often paired with a 46 cm bar. 11 meter to 14 meter kites are paired with something around 51 cm 14m kites and larger will often be paired with either a 58 cm bar or sometimes the 51cm bar.
Adjustable
Adjustable bars will often range from 46 cm to 55cm depending on the brand. These are great as you can adjust and an pair a single bar to all of the kites in your quiver.
Don’t worry too much about this. If you are new, stick to the guidelines I wrote or use an adjustable bar! Use the larter setting for 12 meters and up and the small setting for 11 and under.
Don’t worry if you don’t adjust. A large bar will make the kite turn faster while a small bar will slow down the kite. Some riders prefer slow kites so they use a small bar even on their large kites. Other like a fast kite and will use a large bar on even their smallest kites. This is a personal preference you’ll develop over time.
A quick video about kiteboarding leashes
The Leash
Your control bar is going to come with a leash that will attach to the safety system. You will learn a great deal about this in your kiteboarding lessons. There was a time when control bars came with long handle pass leashes. Now, the short leash is the standard. I did a video on this a while back that I’ll link in if you care to learn more.
A kiteboarding harness connects the rider to the kite
The Harness
The harness is what you wear around your hips or your waist and will connect to your kite.
It will come with a spreader bar and a hook for your control bar. People often think you must be strong to kiteboard but in reality most of the time, the rider is connected to the harness so all the pull is coming from their waist not their arms. Kitebording really can be a sport of fitness. Now, depending on what style of kiteboarding you move into, it can become quite a workout. The good news is it’s only as intense as you want it to be. There are young kids who ride and 80 year olds who still practice!
Harnesses come in two varieties. The seat Harness and the waist Harness.
The Seat Harness
If you're new, or have lower back issues, these can make learning to kiteboard easier and are often more supportive. Kiteboarding schools will use these as it does make learning a bit faster. The reason for this is the pull is coming from your hips. You can sit in them and let the kite pull you. They also prevent the harness from riding up and that is a huge plus.
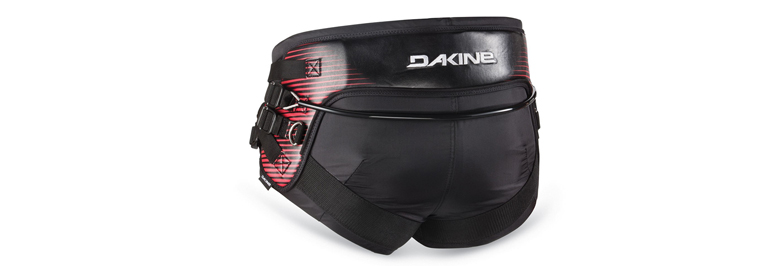
The downside is they do reduce some mobility and some find them uncomfortable. They often fit much like a rock climbing harness. That is depending on the model of course. For women, I often recommend something like the Dakine Vega.
 ..
..
A smaller more streamlined kiteboarding seat harness
The reason for this is that is is a streamlined seat harness so it’s not bulky. The benefit here is that if you have a small waist, its easier for a waist harness to ride up and become uncomfortable. It’s also nice if you have shorter arms. The seat harness will bring the control bar closer to you and allow the rider full control over de-powering the kite. Something you will also learn about in your lesson.
The waist Harness
This is the standard and what the majority of kiteboarders use. The pull comes from your waist so they do require a little more core strength. These allow for maximum flexibility and are not difficult to learn in. There is a small advantage to learning with the seat but most riders will want to be here.
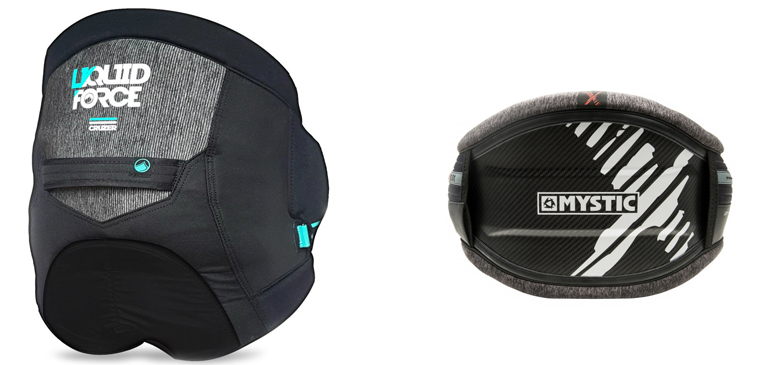
Hardshell waist harness.
Recently, these have really taken off. They are the best of both worlds. Smaller that standard waist harnesses. More supportive and they are made to fit tight so riding up is almost non existent on them. The Mystic Majestic or The entire Ride engine Line up are great examples of these. Men or women will benefit from a harness like this!
Kiteboards are different than wakeboards
The kiteboard
A common question people often ask is do I need a kiteboard? Can’t I just use a wakeboard or a surfboard? You could in fact use either. That said, a wakeboard will be terribly inefficient as its not shaped to sail and a surfboard depending on the construction will likely break from all the pressure. At the very least, you’ll get a lot of heel dents.
It’s best to learn on a kiteboard designed specifically for kiteboarding. There are many styles of boards and many shapes. Like the kite, your best bet is going to be an all around kiteboard not designed for a specific niche. Later on when you develop the skills, you could explore a high end board designed with a specific purpose in mind. Even if you are a surfer looking to use a kite to catch more waves, it’s often recommended to learn on a twintip first. It’s going to make things much easier and it will speed up your learning curve. Granted if you are a really advanced surfer, you could get away with leaning on a kite surfboard.
What about board size? Here's an infographic to help you sort out the correct size. As a new kiteboarder, don’t be afraid to size up. A large board will make learning a lot easier.
We've done a number of videos on boards and we’ll link them into the this blog as well.
Straps
Footstraps look like sandals attached to your kiteboard they are what keep the board on your feet. There’s not too much to dive into on this topic. Most are a one size fits all. Some are more adjustable than others. Meaning you can adjust your stance more. As well as adjust the straps to fit more snug. If the strap isn’t a one size fits all, there are often two sizes. Small and large. Small is usually for size 9 mens USA or 42 European and under while large fits size 10 mens USA or 43/44 European and up. .
A common question wakeboarders or intermediate kiteboards will ask is what about boots? Boots are what wakeboarders and wakestyle kiteboarders use to attach the board to their feet.
For new riders, even if you are a wakeboarder its best to lean with footstraps. Being permanently attached to your board while learning to control the kite is going to make things more difficult than they need to be. If you are are curious about the differences, Blake and I made a video a while back on the topic.
Pump
Don’t forget your pump. You’ll need to inflate your kite and while it’s not the most exciting piece of equipment. You’ll be kicking yourself if you show up to the beach without one. Make sure you have the correct inflation attachment for your kite. If you’re using the oficial pump for your brand, it will come with the correct piece. We prefer, the WMFG tall pumps. These come with an attachment for all the brands and will pump your kite up twice as fast.
Flotation Vest
Something we didn’t mention in the video is a flotation vest or impact vest. As a new kiteboarder, these are highly recommended. You’re going to be spending a lot of time in the water and even the strongest swimmers can get tired. Do yourself a favor and make sure you learn with one.
There are specially designed vest made for kiteboarding. Specifically made to fit with the harness. Some are cut off halfway while others have reduced material in the mid section.
Aside from providing extra flotation, they also provide extra warmth if you happen to ride somewhere with colder conditions.
Wetsuit
Last but not least you will likely need a wetsuit at some point. Unless you are lucky enough to live in the caribbean most water sports call for a wetsuit. Make sure you pick one specifically for kiteboarding. Some wetsuits can be quite fragile or restrictive.
Kiteboarding wetsuits are designed to move for kiteboarding and to keep you warm in the wind.
Depending on how cold the water is, you’ll want something ranging in thickness from 3mm to 6mm. You might need a hood, mittens and booties if you ride somewhere really cold.
Every wetsuit brand is going to have its own size chart and temperature rating per thickness.
As a broad generalization, usually if the air is warm like 80 or 90 degrees and the water is cold like 60 degrees, like many locations in the summer a 3mm will be enough. If the air is colder or the water is pushing into the low 60s or upper 50s you might consider a 4mm or 5mm suit.
Anything colder and a 6mm is recommended. This is just a rough guide. Play it safe and stick with your suits recommended temperatures!
There are a couple different entry systems to consider as well. I did a video on the topic a while back. Give this a watch or give us a call if you’d like to learn more about wetsuits.
How long does it take to become a kiteboarder?
Here at MACkite, we go by the 30 hour rule. Meaning on average it takes most people about 30 hours of practice to become proficient enough to ride.
- 10 hours on the kite.
- 10 hours on the board
- 10 hours to put it all together.
10 hours on the kite
You’ll get most of your kite time on the trainer kite or at your lesson. This is why we recommend practicing with a trainer kite first as you’ll be getting some kite time in. Your lesson should get you the majority of your kite time after the trainer. Some students will spend some time practicing afterwards. Blake and I did a video last year on improving your kite skills. If you’ve already taken a lesson, give this a watch and try to apply some of these concepts.
10 hours on the board
If you have any experience with other board sports it’s going to really help you out in kiteboarding. If you’re already a wakeboarder, a snowboarder, a surfer or a skateboarder you have most of these hours behind you. There is a small learning curve adjusting to consistently edging against the kite but aside from that congratulations, you are ahead of the game.
What if you have to board experience?
That's okay too. It’s just going to take you longer to master riding the board. The good news, is you can cross train before or after your lesson. We’re huge advocates of cableboarding to build boardskills or even cross train for advanced tricks. In fact, we often send our students right to the cable park after their lesson so they can start practicing their boards skills right away.
Here is a video I did a long time ago about the topic.
https://www.youtube.com/watch?v=t7vgxWjbdds&t=1s
If you’ve already taken a lesson, check out this video Blake and I did last year on board skills
10 hours to bring it together
If you’ve taken a lesson, got your kite time, put in the time on the board it will likely be another 10 hours of water time before your riding upwind, feeling truly independent and in complete control. This is often the most exciting part of kiteboarding. You will never forget the first time you get up and three freedom that comes with it and you’ll never forget the first time you ride upwind! After that, the fun about kiteboarding is the progression and overcoming challenges. There's always another trick to work on or another skill set to built.
If you’ve made it this far, congratulations! Kiteboarding is a very special sport in the sense that it does take a little bit of drive to learn. Unlike other sports where you can pick up some gear and hang out in the ski lodge all day. If you meet another kiteboarder, you’ll share a certain bond. Not only because you both practice this crazy adventure sport but because if you’re an independent kiteboarder, you're also likely a passionate motivated individual who loves to overcome challenges. It’s not the hardest sport to learn. Not at all but if you do commit, the rewards and the stoke are utterly endless!
We hope you found this helpful! If you are looking for your first set up, something you can learn on yet will not outgrow check out our learn to ride package.

This is the kite Blake learned on and the kite he is choosing to use for in 2019.
-Written and produced by Blake Olsen & Ryan (Rygo) Goloversic.
 Blake Olsen
A Michigan boy through and through (even though he was born in Saudi Arabia), Blake is a youth with a lifetime of experiences and adventures. Not only that, he's passionate about sharing his zest for life with others. He is proficient at many fields, including kiteboarding and acting as concierge to any who simply ask. Looking for an adventure? Well, Blake is your guy. From sailing the Gulf and the Caribbean to backpacking Hawaii and Southeast Asia, he knows his stuff and can make your vacation into an adventure.
Webpage: BlakeTheOlsen.com
Instagram: @BlakeTheOlsenFacebook: BlakeOlsen
 Ryan (Rygo) Goloversic
Just a dude from a kite shop testing all the gear one session at a time.
Many people dream of quitting their job, traveling the world and pursuing their passions. Rygo is one of those people who pulled the trigger. About eight years into a postal career, he decided to change everything and travel as a freelance videographer & writer. This took him from coast to coast and a variety of countries. Nowadays you can catch him on the phones, doing lessons, or working on videos. Of course, he still makes a point to travel as often as possible. His mission is to help people and share the stoke with his customers and students alike. Get out there and kiteboard.
Producer of: Ride with Blake I Sessions I Versus I Destinations I Foil Friday
Recent Posts
-

North Navigator Pro Quick Release | How to Swap Yours Out With Ease
What You Need Before starting the replacement process, ensure you have all the necessary t …18th Apr 2024 -

Foil Drive | Essential Tips to Supercharge Your First Session
The Foil Drive makes your foiling life easier. You'll get up easier and catch more waves, …17th Apr 2024 -

2024 Duotone Slick Wing Review | What's New in This Year's Model?
The Duotone Slick has been a favorite of many for several years. Pros love it for its speed, …15th Apr 2024